'%3E%3Ctitle%3Esun%3C%2Ftitle%3E%3Cpath%20d%3D'M30.4%2014.72q0.64%200%201.12%200.384t0.48%200.896q0%201.28-1.6%201.28h-1.536q-1.6%200-1.6-1.28%200-0.512%200.48-0.896t1.12-0.384h1.536zM16%207.232q3.648%200%206.24%202.56t2.592%206.208q0%203.712-2.592%206.272t-6.24%202.56-6.208-2.56-2.56-6.272q0-3.648%202.56-6.208t6.208-2.56zM16%2022.4q2.624%200%204.512-1.856t1.888-4.544q0-2.624-1.888-4.512t-4.512-1.888-4.512%201.888-1.888%204.512q0%202.688%201.888%204.544t4.512%201.856zM4.8%2016q0%201.28-1.6%201.28h-1.6q-1.6%200-1.6-1.28%200-0.512%200.48-0.896t1.12-0.384h1.6q0.64%200%201.12%200.384t0.48%200.896zM16%204.8q-0.512%200-0.896-0.48t-0.384-1.12v-1.6q0-0.64%200.384-1.12t0.896-0.48%200.896%200.48%200.384%201.12v1.6q0%200.64-0.384%201.12t-0.896%200.48zM16%2027.2q0.512%200%200.896%200.48t0.384%201.12v1.6q0%200.64-0.384%201.12t-0.896%200.48-0.896-0.48-0.384-1.12v-1.6q0-0.64%200.384-1.12t0.896-0.48zM27.776%206.080l-1.088%201.088q-1.088%201.088-2.048%200.256-0.896-0.896%200.256-2.048%200.128-0.192%201.088-1.152%201.152-1.088%202.048-0.192t-0.256%202.048zM5.376%2024.896q0.448-0.512%201.056-0.576t0.928%200.32q0.384%200.384%200.32%200.992t-0.512%201.056l-1.152%201.152q-0.448%200.448-1.056%200.512t-0.928-0.32q-0.96-0.896%200.192-2.048%200.192-0.128%201.152-1.088zM6.016%204.224l1.152%201.152q1.152%201.152%200.192%202.048-0.32%200.32-0.928%200.256t-1.056-0.512q-0.96-0.96-1.152-1.088-0.448-0.448-0.512-1.056t0.32-0.992q0.32-0.384%200.928-0.32t1.056%200.512zM24.896%2026.688q-1.152-1.152-0.256-2.048t2.048%200.256l1.088%201.088q1.152%201.152%200.256%202.048t-2.048-0.192q-0.96-0.96-1.088-1.152z'%2F%3E%3C%2Fsvg%3E)
Welcome to my World!!!
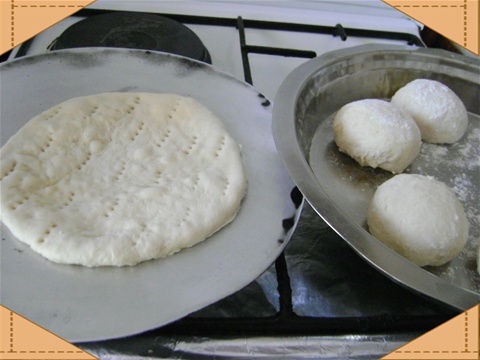
Puree,Roti,Naan,Paratha
Serves 10 pieces plain puree
What you need
2 mugs 'atta' [whole wheat flour]
1 mug water
1/2 mug dry 'atta' for dusting
1/2 litre cooking oil for deep frying
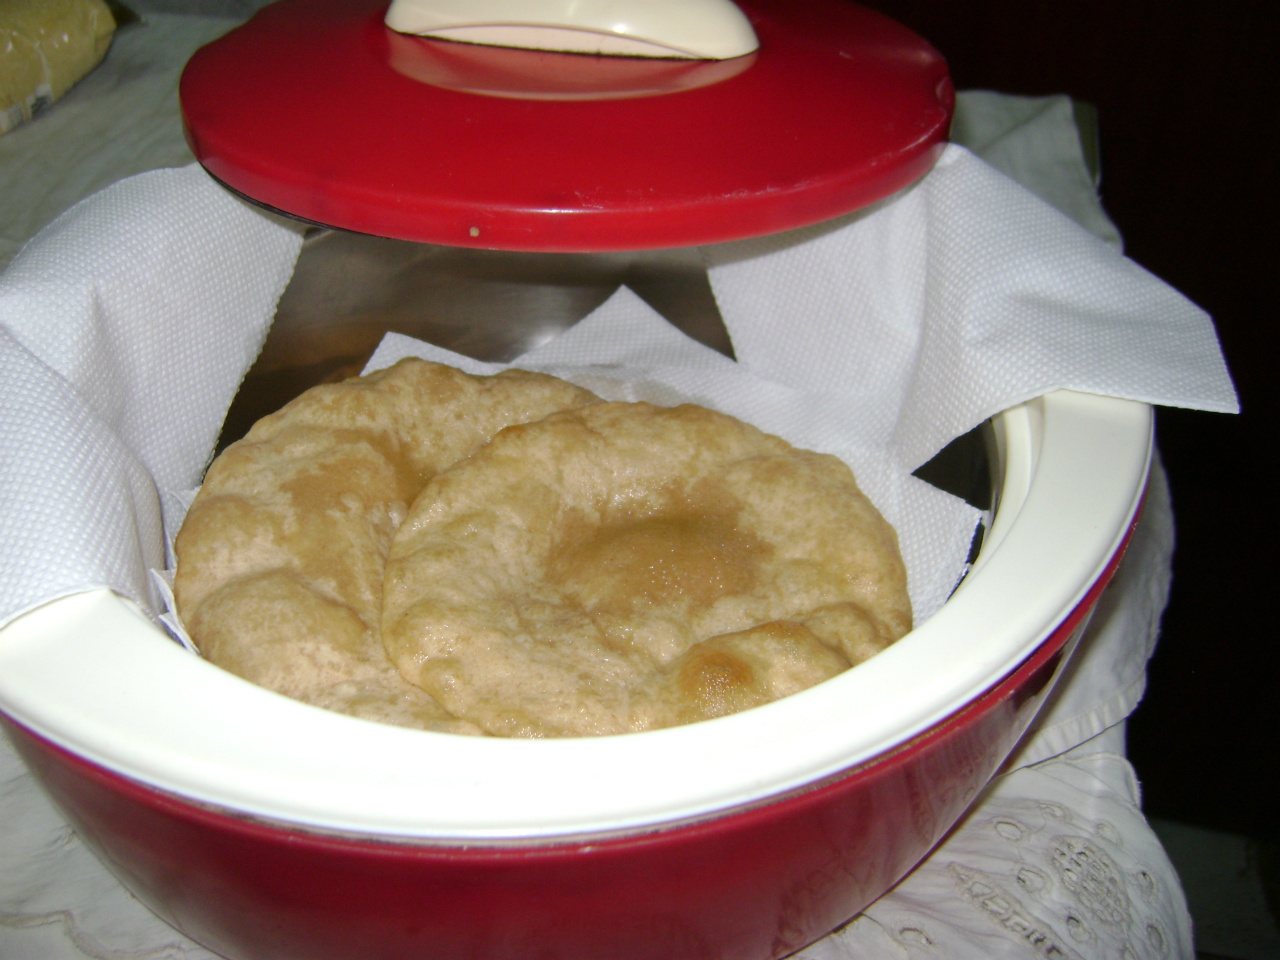
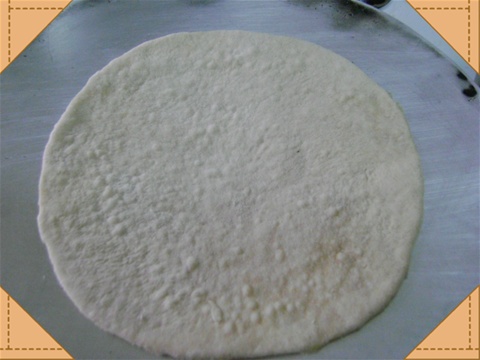
Plain Puree
How to
Steps:
1. In a basin, put the 'atta' and make a depression in the middle.
2. Pour the water little by little in the depression and with your clean hands, knead the flour into a smooth, pliable dough.
3. Let the dough rest for 15 minutes.
4. Divide it into 10 parts.
5. Using your palms, roll each part into a smooth ball.
6. Place one ball on a flat surface, dust lightly with the dry 'atta' and using a rolling pin, flatten it to a circle about 8 cm in diameter.
7. Repeat step 6 till you have made all the 10 circles. Keep them separate from each other on the flat surface.
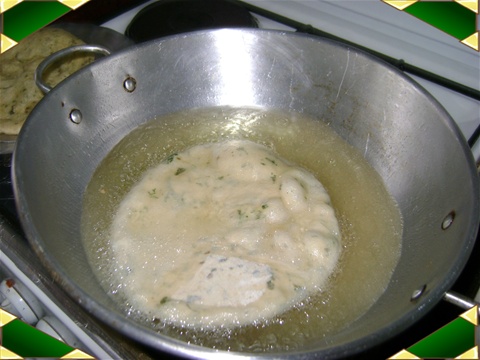
8. Take a deep frying pan and put the oil in it on high heat.
9. Carefully slide one 'circle' at a time, into the hot oil.
10. With a long handled frying spoon [with holes in it], press on the 'circle' lightly and turn it over when it starts swelling.
11. Let it fry for a minute so that both the sides are cooked to a light golden colour.
12. Remove and place onto an asorbant paper to drain off excess oil.
13. Keep in a 'hot-pot', lined with a clean cotton cloth and cover with the lid to stay warm and soft till serving time.
14. Repeat steps 9 - 13 till all the 'circles' have been fried.
15. Serve the wholesome, hot "Plain Puris" with any vegetarian dish for lunch or dinner.

Serves 10 pieces padhoru
What you need
4 cups self-raising white flour ['maida']
2 cups water
1/2 litre oil for frying
1/2 cup dry same flour for dusting
Padhorus-Plain
How to
Steps:
1. Put the flour in a basin and pour the water little by little in the middle.
2. With clean hands, mix and knead the flour till you have a smooth and pliable dough.
3. Cover with a cotton cloth and leave aside for 30 minutes.
4. Divide the risen dough into 10 parts.
5. With your palms, roll each part into a smooth ball.
6. Place each ball on a flat surface, dust with a little dry flour and using a rolling pin, flatten it into a circular disc about 10 cm in diameter.
7. Keep the 'circles' separately on the flat surface.
8. In a deep frying pan, put the oil on high heat.
9. Carefully slide one 'circle' into the hot oil.
10. Let it fry for a few seconds and press it slightly with a long handled frying spoon.
11. Turn over the 'circle' and let it swell up and attain a very light golden colour.
12. Remove from the oil and place it on absorbent paper to drain off excess oil.
13. Put in a 'hot-pot' lined with a clean cotton cloth and keep it covered so that it remains warm and soft.
14. Repeat steps 9 - 13 till all the 'circles' have been fried.
15. Serve the "Podhorus-Plain" with any vegetarian dish for lunch or dinner
Serves 10 pieces green padhoru
What you need
4 cups self-raising white flour [maida]
1/2 cup same dry flour for dusting
1/2 cup finely chopped, fresh, green coriander leaves
1/2 teaspoon salt
2 cups water
1/2 litre oil for frying
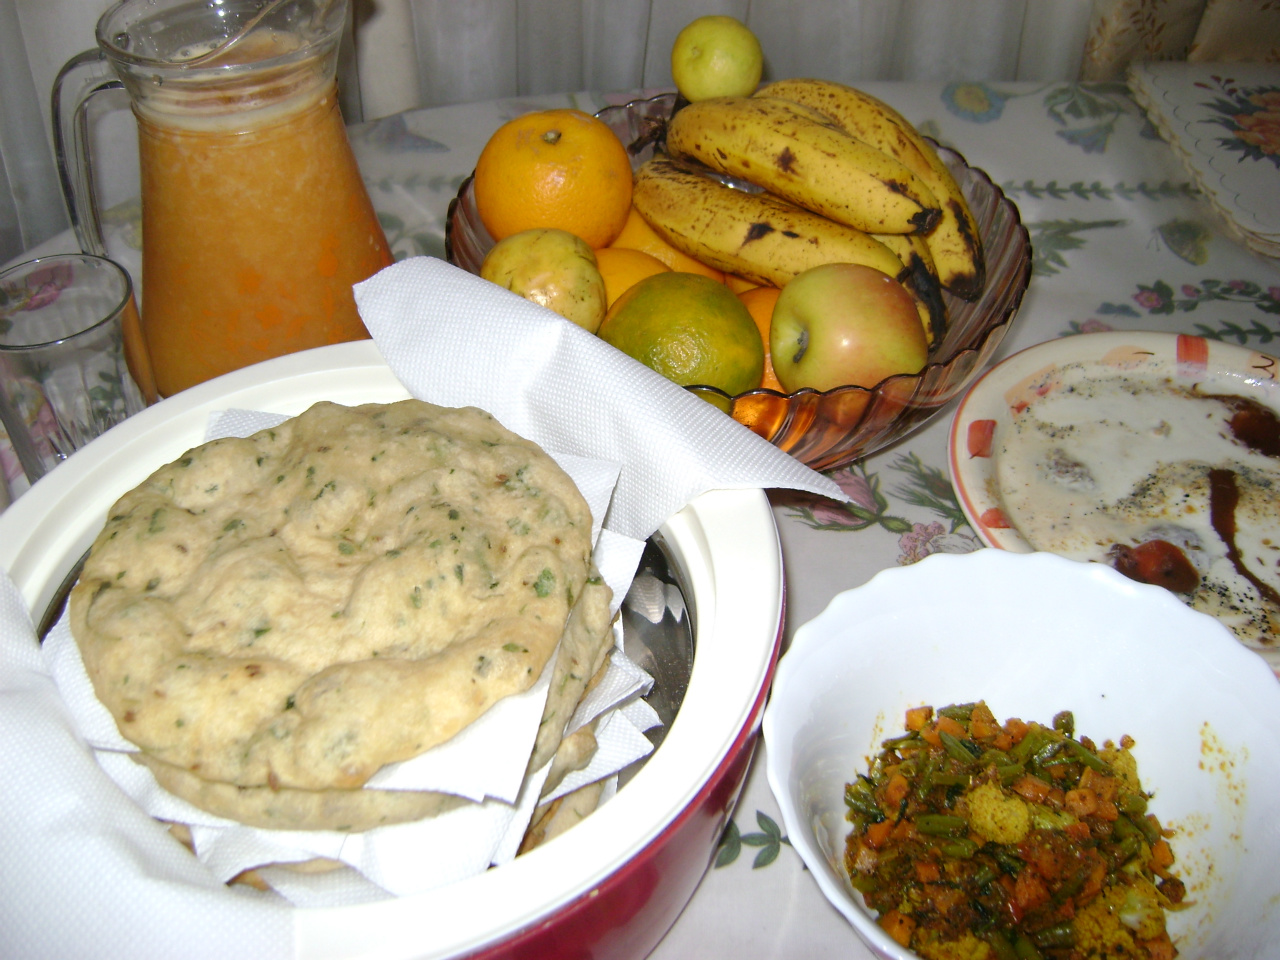
Thania Padhorus
How to
Steps:
1. In a basin, put the flour, salt and the coriander leaves.
2. With clean hands, mix lightly.
3. Add the water, a little at a time, mix and knead into a smooth, pliable dough.
4. Cover with a cloth and let it stay for 30 minutes.
5. Divide the 'risen' dough into 10 parts.
6. Roll each part in your palms to make smooth balls.
7. Place each ball on a flat surface, dust lightly with the dry flour and using a rolling pin flatten it into a circular disc about 10 cm in diameter.
8. Repeat step 7 till you have made all the 'circles'. Place them separately on the flat surface.
9. Put the oil in a deep frying pan on high heat.
10. Slide one 'circle' carefully into the hot oil and let it cook for a few seconds.
11. Take a long handled frying spoon and press gently the middle of the 'circle' so that it swells up.
12. Turn over the circle and allow to fry for another minute so that it gets a very light golden colour.
13. Remove from the oil and place onto some absorbent paper to drain off excess oil.
14. Place in a 'hot-pot' lined with a clean cotton cloth and cover it so that it remains warm and soft.
15. Repeat steps 10 - 14 till you have fried all the 'circles'.
16. Serve the 'Thania Padhorus' with any vegetarian dish for lunch or dinner.
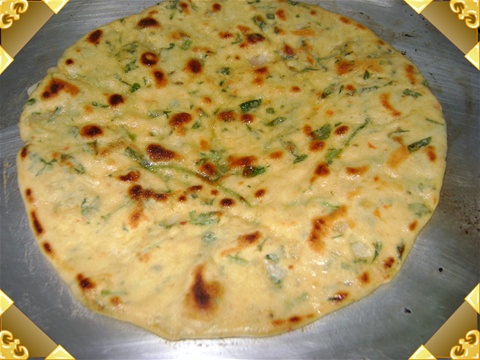
Serves 10 pieces methi padhoru
What you need
4 cups 'self-raising' white flour [maida]
1 cup fresh or 1/2 cup dried, fenugreek leaves [methi] finely chopped
1 tablespoon fresh green coriander leaves
1 teaspoon salt
1/2 teaspoon 'zeera' seeds
2 cups water
1/2 cup dry flour for dusting
1/2 litre oil for deep frying
Methi Padhorus
How to
Steps:
1. In a basin put the flour, salt and 'zeera' seeds. Mix.
2. Add the 'methi' and coriander leaves. Mix lightly.
3. In the middle, add the water,a little at a time and with your clean hands, knead into a smooth, pliable dough.
4. Cover with a cloth and allow to stand for 30 minutes so that the dough rises.
5. Divide the dough into 10 parts.
6. Take one part in your palms and roll it into a smooth ball.
7. Place it on a flat surface and dust lightly with the dry flour.
8. Using a rolling pin, flatten the ball to a circular disc about 10 cm in diameter.
9. Repeat steps 6 - 8 till you have made all the 'circles'. Place them separately on the flat surface.
10. In a deep frying pan, put the oil on high heat.
11. Slide one 'circle' carefully into the hot oil and let it fry foe 30 seconds.
12. With a long handled frying spoon,press onto the circle in the oil so that it swells up.
13. Turn the 'circle' over so that the other side also gets fried for a minute.
14. When it starts becoming slightly golden in colour, remove from the oil and place on some absorbent paper to drain off the excess oil.
15. Place it in a 'hot-pot' lined with a clean cotton cloth and keep it covered so that it remains warm and soft.
16. Repeat steps 11 - 15 till you have fried all the 'circles.
17. Serve the extra-ordinary 'Methi Podhorus' with any vegetarian curry for brunch, lunch or dinner.
Serves 6 pieces fulkay
What you need
2 mugs of good quality 'atta' [finely ground, whole wheat flour
1 mug water
1/2 mug dry flour for dusting
3 teaspoons butter [optional]
A non-stick griddle ['tava'] for cooking
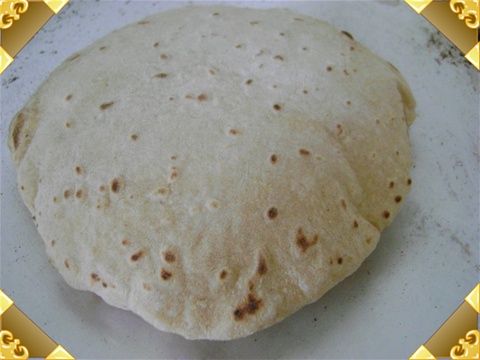
Fulkay
How to
Steps:
1. In a basin, put the flour and add the water, a little at a time, while you mix the flour with your clean hands.
2. Knead the mixture into a smooth, pliable dough. Leave it aside for 15 minutes.
3. Divide the dough into 6 parts.
4. Roll each part in your palms to make smooth balls.
5. Place one ball on a flat surface and dust it lightly with the dry flour.
6. With a rolling-pin, flatten it to make a thin circle of about 10 cm diameter.
Note: Do not fret if you cannot make a perfect circle - you can use a large pastry cutter to get a round shape!
7. Pre-heat the griddle ['tava'] on medium heat.
8. Carefully lift the flat circle and place it on the hot griddle.
9. Wait for 30 seconds, turn it over with your fingers or a flat spatula.
10. Let it cook for another 30 seconds so that light brown spots appear on the under side touching the griddle.
11. Turn it over and with a clean cotton cloth, gently press the 'circle' for a few seconds till it swells up like a ball.
Note: If you don't get it right the first time, be patient - practice makes it perfect!!
12. Carefully remove it and place it in a 'hot-pot' lined with a cotton cloth.
13. You may dot it with some butter if you like.
14. Repeat steps 8 - 13 till you have cooked all the 'chapatis'. Keep them covered so that they remain warm and soft.
15. Serve the nutritious 'Phulkay' with any meat/vegetarian dish for lunch or dinner.
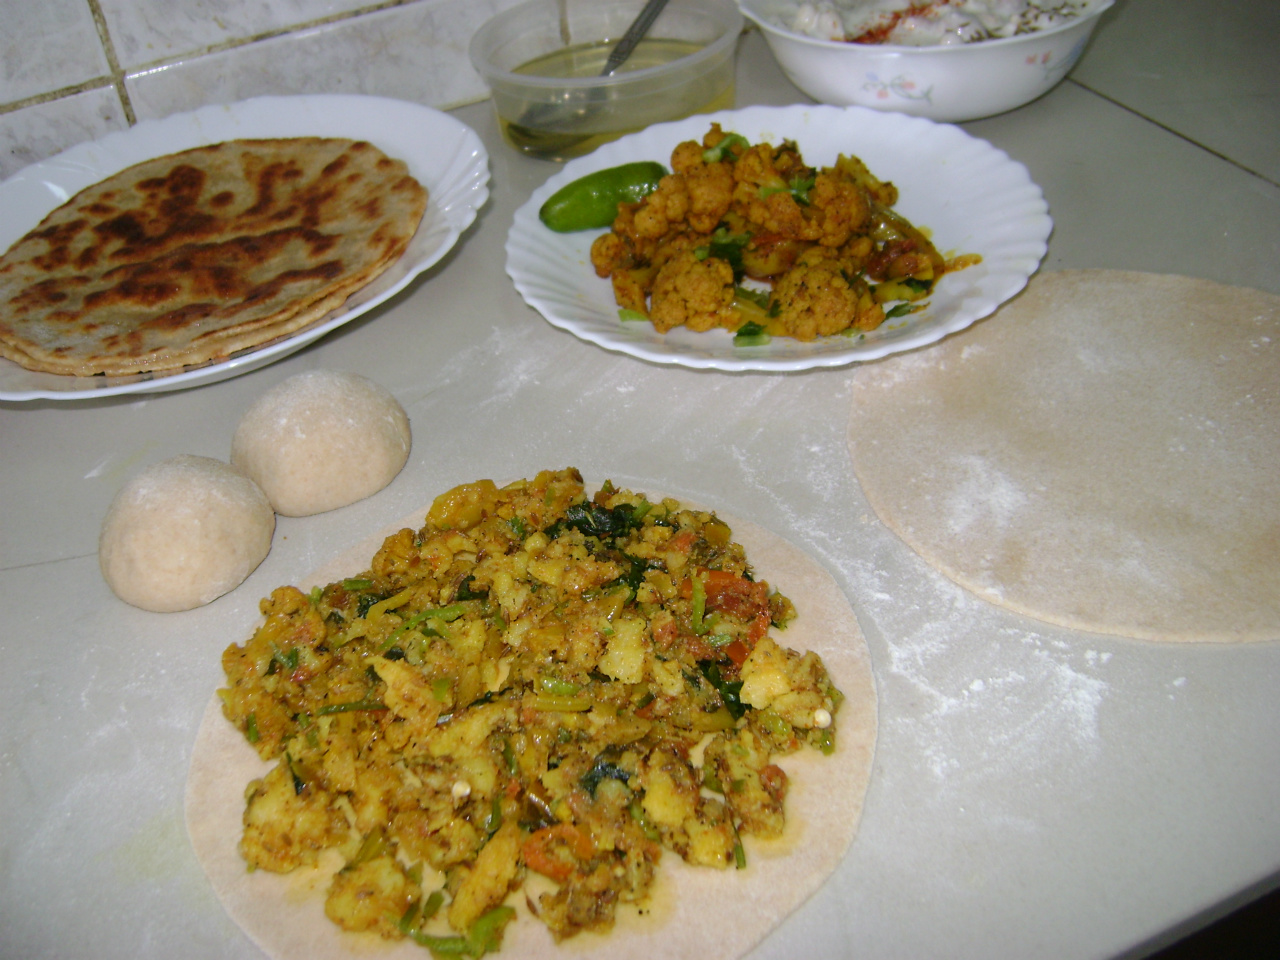
Serves 5 pieces aloo roti
What you need
For the Roti:
2 mugs of good quality 'atta' [whole wheat flour] or plain white flour [maida]
1 mug water
1/2 mug dry flour for dusting
1/2 mug oil for cooking
For the 'Aloo' Filling:
6 medium sized white potatoes, boiled, peeled and mashed
1 tablespoon fresh green coriander leaves, finely chopped
1 teaspoon finely chopped green chilly
1 teaspoon fresh mint leaves, finely chopped
1 teaspoon salt
1/2 teaspoon red chilly powder
1 teaspoon 'zeera' seeds
1 teaspoon dry coriander seeds
1/4 teaspoon black pepper powder
1 tablespoon fresh lemon juice
For Cooking:
A non-stick griddle ['tava']
Aloo Roti
How to
Steps:
1. In a basin, put the flour and add the water, a little at a time in the middle.
2. With clean hands, mix and knead into a smooth, pliable dough. Leave aside for 15 minutes.
3. Divide the dough into 10 parts.
4. Roll each part in you palms to make a smooth ball.
5. Place each ball on a flat surface, dust with dry flour and using a rolling- pin, flatten into a 2 cm thick disc about 5 cm in diameter.
6. Repeat steps 4 and 5 till you have all the 10 'roti' discs ready. Leave them separately on the flat surface of your working counter.
7. In a separate basin, put all the ingredients listed for the 'Aloo'.
8. Mix gently but thoroughly, press slightly and divide into 5 soft 'aloo' discs about 4 cm in diameter. Leave them aside.
9. Dust the flat surface lightly with the dry flour. Take 1 'roti' disc from step 6. Place it on the flour and put 1 'aloo' disc on it.
10. Cover it with another 'roti' disc and press the edges gently but firmly so that the filling remains inside.
11. Dust lightly with the dry flour and with the help of the rolling-pin, flatten carefully into a circle of about 10 cm diameter. The 'chapati' should not break apart!
12. Place the griddle on medium heat and put a tablespoon of oil on it.
13. Gently slide the 'filled chapati' onto the hot oil and let it cook for 1 - 2 minutes so that the underside touching the griddle becomes golden brown.
14. Sprinkle a teaspoon of oil onto the top surface of the 'chapati' and using a flat spoon/spatula, carefully turn it over.
15. Let it cook for another 1 minute so that both the sides are crisply cooked and attain a golden brown colour.
16. Remove and place in a 'hot-pot' lined with grease-proof paper.
17. Repeat Steps 9 - 16 till you have made all the 'chapatis'.
18. Serve the "Aloo Rotis" with 'dahey-phaley' or any 'raitas' and 'lassi' of your choice.
Serves 4 pieces mooli roti
What you need
For the Roti:
2 mugs good quality 'atta' [whole wheat flour] or plain white flour [maida]
1 mug water
1/2 mug dry flour for dusting
1/2 mug oil for frying
For the Mooli Filling:
2 mugs of freshly grated white radish
1 teaspoon salt
1/2 teaspoon red chilly powder
1/2 teaspoon black pepper powder
1/2 teaspoon 'zeera' seeds
1 teaspoon, finely chopped green chilly
1 tablespoon chopped fresh coriander leaves
A non-stick griddle ['tava'] for the cooking
Mooli Roti
How to
Steps:
1. In a basin, put the 'atta' and little by little add the water in the middle.
2. With clean hands, mix and knead into a smooth, pliable dough.
3. Cover with a cloth and leave aside for 15 minutes.
4. Divide the dough into 8 parts.
5. Take one part and roll it in your palms to make a smooth ball.
6. Put it on the flat surface of your working counter, dust it lightly with the dry flour and using a rolling-pin, flatten it into a circle about 10 - 12 cm in diameter.
7. Repeat steps 5 and 6 till you have made all the 8 'chapati circles'. Keep them on a flat surface, separate from each other, so that they do not stick together.
8. To prepare the filling, gently squeeze the grated radish to remove excess liquid and place in a basin.
9. Add the other ingredients listed for the filling. Mix, divide into 4 portions and keep aside.
10. Put the griddle [tava] on medium heat.
11. Put a tablespoon of oil on the hot griddle.
12. Place 1 'chapati circle' on the oil and with a spoon, spread 1 portion of the filling from step 9, evenly over it.
13. Quickly take a second 'chapati circle' and place it gently over the filling so that t fits exactly on the lower one.
14. With a fork, press the edges of the 'circle' to bind the two parts together.
15, Press the prongs of the fork over the 'chapati' a few times to release any trapped air.
16. Let the 'chapati' cook for 1 minute till the undside has become slightly browned.
17. Sprinkle 1 tablespoon of oil on the top and using a flat spoon or spatula, carefully turn over the 'chapati' on the griddle.
18. Let it cook for another minute till both sides are crisp and golden brown.
19. Remove and place in a 'hot-pot' lined with some absorbent paper.
20. Repeat Steps 10 - 19 till you have made all the four 'chapatis'.
21. Serve these unusually tasty 'Mooli Rotis' with plain yoghurt, 'lussi' and salads of your choice.
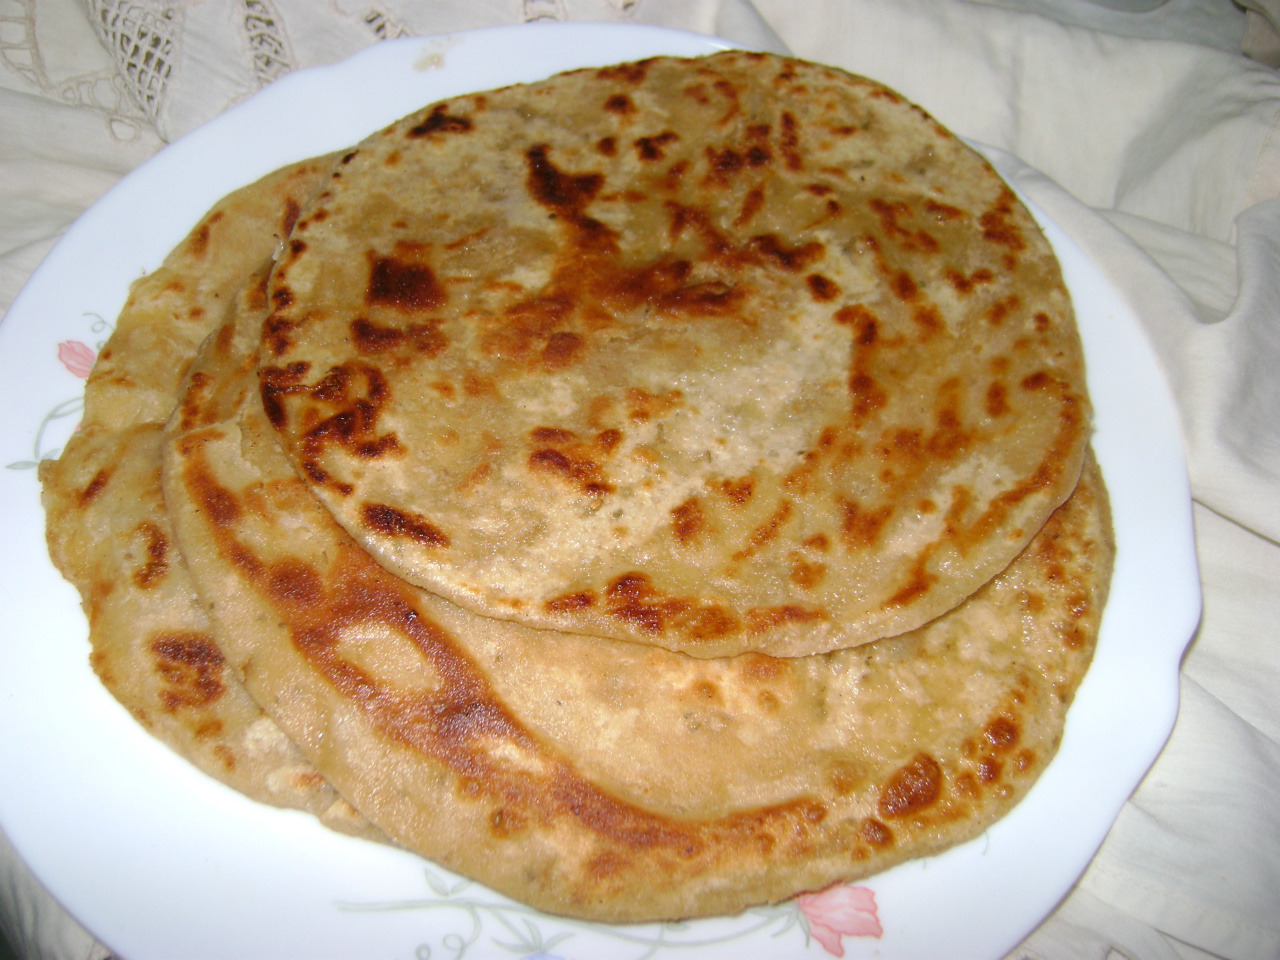
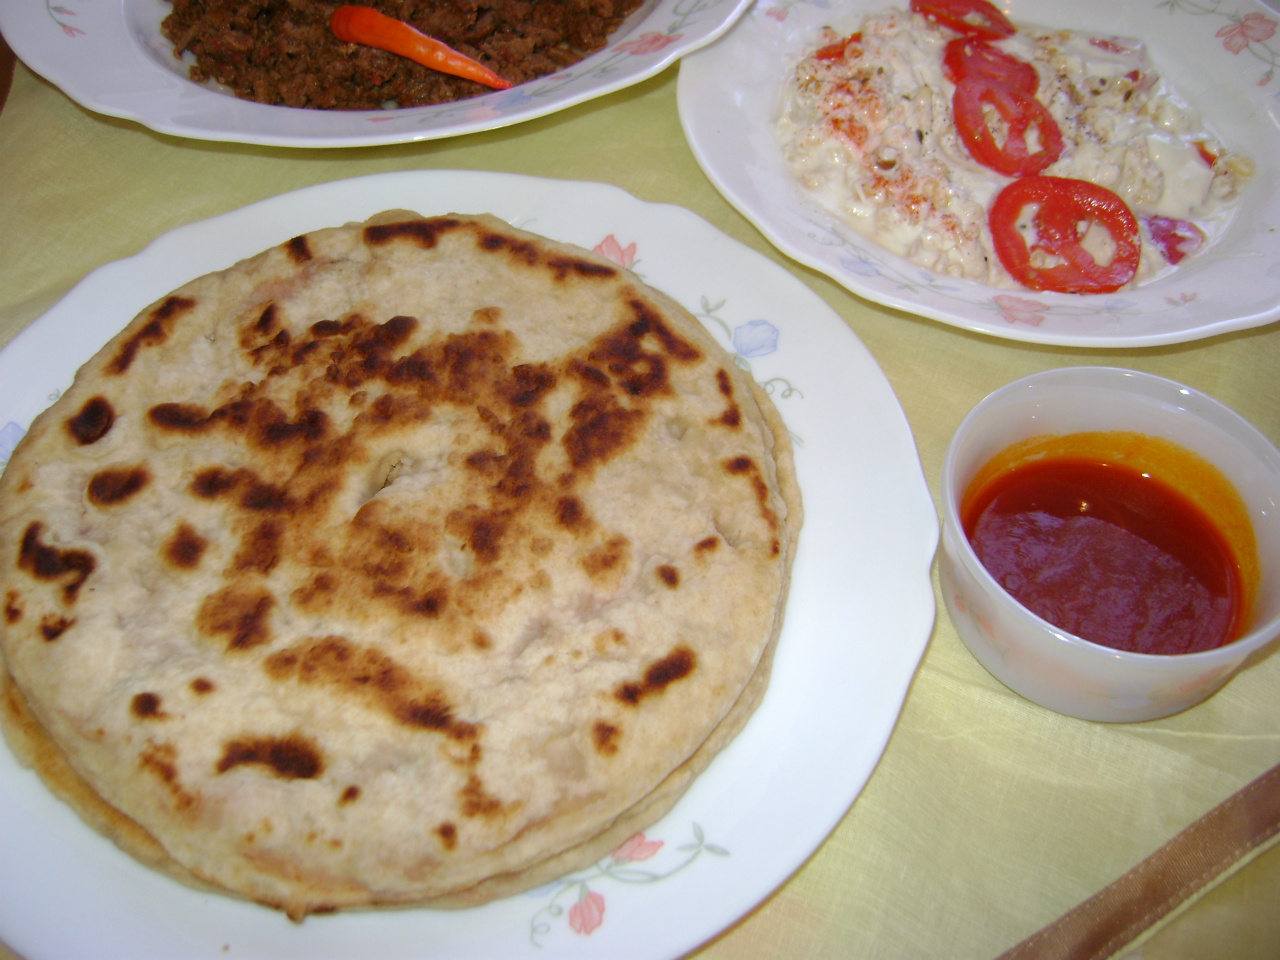
Serves 10 pieces methi roti
What you need
For the dough:
2 mugs 'atta' [whole wheat flour]
1/2 mug 'besan' [yellow gram flour]
1 teaspoon baking powder
2 teaspoons salt
1/2 teaspoon red chilly powder
1 teaspoon 'zeera' seeds
1 teaspoon dry coriander seeds
1/2 teaspoon black pepper powder
1 teaspoon ginger paste
1 teaspoon garlic paste
1 teaspoon finely chopped green chilly
1 tablespoon fresh coriander leaves, chopped
1 medium sized red onion, very finely chopped
1 mug of fresh 'methi' [fenugreek] leaves, rinsed, drained and finely chopped
1/4 mug oil
1 mug warm water
For the Cooking:
1/2 mug dry flour for dusting
1/2 mug oil
A non-stick griddle ['tava']
Methi Roti
How to
Steps:
1. In a basin, put all the ingredients listed for the 'dough' except the water.
2. With your clean hands mix gently and add a little water at a time in the middle.
3. Knead into a pliable dough. cover it with a cloth and leave it for 20 - 30 minutes.
4. Divide the dough into 10 parts.
5. With your palms, roll each part to a smooth ball and leave aside.
6. Place the griddle on medium heat and put a teaspoon of oil on it.
7. Take one 'ball' from step 5, place it on a flat surface, dust with a little dry flour.
8. Using a rolling-pin, flatten it into a thin chapati circle of about 10 cm in diameter.
9. Place it on the hot oil and let it cook for a minute.
10. Spread another teaspoon of oil on the surface of the 'chapati' and turn it over with a spatula.
11. Let it cook for another minute so that both the sides become slightly crispy and golden brown in colour.
12. Remove and place in a 'hot-pot' lined with some absorbent paper.
13. Repeat steps 6 - 12 till you have made all the 'chapatis'.
14. Serve the 'Methi Rotis' hot with unsalted butter, plain yoghurt, 'lussi', 'raitas' and salads of your choice for brunch or any other meal.
Serves 4 daal roti
What you need
For the 'Daal' Filling:
1 cup washed, white, split 'maash' lentils, soaked for 1 hour
1 teaspoon salt
1/2 teaspoon red chilly powder
1/2 teaspoon black pepper powder
1 teaspoon 'zeera' seeds
1/2 teaspoon 'ajwain' seeds
1/2 teaspoon garlic paste
1/2 teaspoon ginger paste
1 teaspoon lemon juice
1 tablespoon finely chopped coriander leaves
1 teaspoon fresh green chilly, chopped
2 cups water for boiling
For the 'Roti'
2 mugs good quality 'atta' [whole wheat flour]
1 mug water
1/2 mug dry flour for dusting
1/2 mug oil for cooking
A non-stick griddle
Daal Roti
How to
Steps:
1. In a pan put 2 cups of water on high heat.
2. Add the drained, soaked lentils and let it boil for 15 - 20 minutes.
3. The lentils should become tender and quite dry - take care not to burn them!
4. Remove from the heat allow to cool for 10 minutes.
5. Add all the other ingredients listed for the 'filling' and mix thoroughly with a wooden spoon.
6. Divide the 'filling' into 4 portions and leave it aside.
7. In a basin put the 2 mugs of 'atta' and little by little add the water in the middle.
8. With clean hands, mix and knead the flour into a pliable dough.
9. Cover it with a cloth and leave it aside for 15 minutes.
10. Divide the dough into 8 parts.
11. Take one part and using your palms, roll into a smooth ball.
12. Put it on a flat surface, dust it lightly with the dry flour and roll it, using a rolling-pin, to a thin 'chapati circle' about 10 -12 cm in diameter.
13. Repeat steps 11 and 12 till you have made all the 8 'circles'. Keep them separately on the flat surface of your working counter so that they so not stick together.
14. Place the griddle on medium heat and put a tablespoon of oil on it.
15. Put one 'chapati circle' on the hot oil and very quickly spread evenly, 1 portion of the 'daal filling' from step 6, over it.
16. Place a second 'chapati circle' on top of the 'filling' so that it fits exactly over it.
17. Use a fork to press the egdes slightly so that the two 'circles' stick together.
18. Make a few 'prong' marks on the 'chapati' so that any air trapped can be released.
19. Let one side be fried for a minute so that it becomes light brown in colour.
20. Sprinkle 1 tablespoon of oil on top of the 'chapati'. Carefully turn it over using a flat spoon or spatula.
21. Allow to cook for another minute so that both the sides are crispy and golden brown in colour.
22. Remove from the griddle and place in a 'hot-pot' lined with absorbent paper.
23. Repeat steps 15 - 22 till you have made all the 'chapatis'.
24. Serve the "Daal - Rotis", hot with 'raitas', salads and lemon pickles for lunch or dinner.
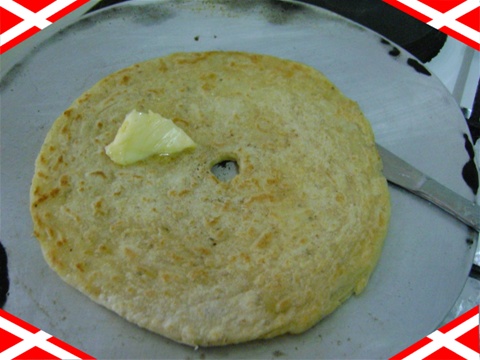
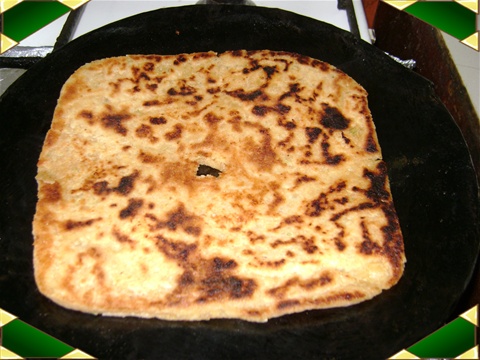
Serves 4 plain paratha
What you need
2 mugs good quality 'atta' [whole wheat] flour
1 mug water
1/2 mug soft, salted butter/margarine
1/2 mug dry flour for dusting
A non-stick griddle for cooking
Plain Paratha
How to
Steps:
1. In a basin put two mugs of 'atta'.
2. Add the water, a little at a time, in the middle and using clean hands, mix and knead into a pliable dough.
3. Cover and put it aside for 15 minutes.
4. Divide the dough into 4 portions.
5. Take 1 portion and roll it in your palms to make a ball.
6. Put it on a flat surface, lightly dust with the dry flour and using a rolling-pin flatten it into a thin, large circle.
7. Spread 1 tablespoon of the butter/margarine evenly over the whole surface of the 'circle'.
8. Starting from your side and going upwards, fold the circle with your hands so that you get a long roll formed.
9. Now fold the roll length-wise so that you get a 'wheel' shaped ball.
10. Press it slightly, dust lightly again and with the rolling pin, flatten it to a 'circle' about 10 -12 cm in diameter.
11. Place the griddle on medium heat.
12. Carefully place the 'circle' on the warm griddle and spread 1 teaspoon of butter/margarine on the top surface.
13. Wait for a minute and then either using your hand or a flat spoon, turn over the 'circle' on the griddle.
14. Let it cook for 1 minute so that the lower side becomes slightly browned.
15. Spread 1 teaspoon of butter/ margarine over the top and turn over the circle again.
16. Allow to cook for another minute so that both the sides are crisp and golden brown in colour.
17. Remove from the griddle and put it in a hot-pot lined with some grease-proof paper.
18. Repeat steps 5 - 17 till you have made all 4 'chapatis'
19. Serve the "Plain Parathas" , hot, with any 'curry' and pickles for breakfast or lunch. [They can be a bit 'heavy' for dinner!]
Serves 4 ajwain paratha
What you need
2 mugs plain white flour ['maida']
1 mug water
2 teaspoon 'ajwain' seeds
1/2 mug dry flour for dusting
1/2 mug soft, salted butter/margarine
A non-stick griddle ['tava']
Ajwain Paratha
How to
Steps:
1. Put 2 mug of the flour in a basin. Add the water a little at a time, in the middle.
2. Using you clean hands, mix and knead into a pliable dough. Cover with a cloth and leave aside for 15 minutes.
3. Divide the dough into 4 portions.
4. Take 1 portion and roll it into a ball in your palms.
5. Place it on a flat surface and dust it lightly with the dry flour.
6. Use a rolling-pin to flatten it into a thin, large circle.
7. Spread 1 tablespoon of butter/margarine evenly all over the surface of the 'circle'.
8. Dust it lightly with the dry flour and sprinkle 1/2 teaspoon of 'ajwain' seeds over it.
9. Starting from your side, fold the circle going upwards to make a long roll.
10. Now fold the roll lengthwise to form a 'wheel' shaped ball.
11. Press it a bit, put it on the flat surface, dust it lightly again and flatten it to a 'circle' about 10-12 cm in diameter.
12. Place the griddle on medium heat.
13. Put the 'circle' on the warm griddle and spread 1 teaspoon of butter/margarine on the top surface.
14. Let it cook for a minute and then using a flat spoon or your fingers, turn the 'circle' over on the griddle.
15. Spread another teaspoon of butter/margarine on the surface and allow to cook for another minute.
16. When the lower side become lightly browned, turn it over again so that both the sides are crisp and golden brown in colour.
17. Remove and place in a hot-pot lined with some grease-proof paper.
18. Repeat steps 4 - 17 to make all the 'chapatis'.
19. Serve the exotic tasting 'Ajwain Parathas', hot, with any 'curry' and 'pickles' for any meal of the day.
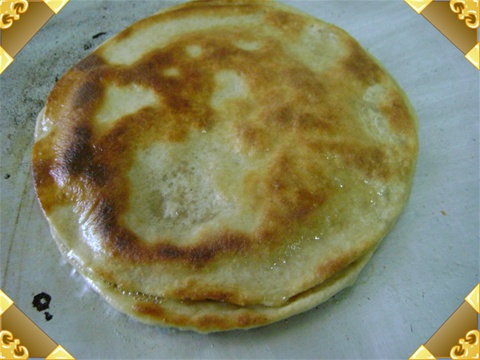
Serves 4 mitha paratha
What you need
2 mugs good quality 'atta' [whole wheat flour]/plain white flour [maida]
1 mug water
1/2 mug soft, salted butter / margarine
1/2 mug fine sugar
1/2 mug dry flour for dusting
A non-stick griddle ['tava']
Mitha Paratha
How to
Steps:
1. In a basin, put the 'atta' and add a little at a time, the water in the middle.
2. With clean hands, mix and knead the flour into a pliable dough.
3. Cover it with a cloth and leave it for 15 minutes.
4. Divide the dough into 4 portions.
5. Take one portion and roll it in your palms to make a ball.
6. Place it on a flat surface, lightly dust with the dry flour and roll it with a rolling-pin to a thin, flat circle.
7. Take 1 tablespoon of the butter/margarine and smear it evenly over the whole surface of the 'circle'.
9. Sprinkle 2 - 3 tablespoons of the sugar over the 'circle'
10. Starting from your side, roll the 'circle' outwards from one end to the other.
11. With your fingers,gently press the 'roll' so that the sugar gets stuck in properly.
12. Now fold the 'roll' longitudinally to make a 'wheel'-shaped ball.
13. Dust it lightly again with the dry flour and use the rolling pin to flatten it to 'chapati' 10 - 12 cm in diameter.
14. Place the griddle on medium heat and put a teaspoon of butter/margarine on it.
15. Carefully place the 'chapati' on it and let it cook for a minute.
16. Put another teaspoon of butter/margarine on the top.
17. Using a flat spoon/spatula, turn over the 'chapati' and let the other side cook for a minute.
18. Check that both the sides become crisp and are light bown in colour.
19. Remove and place on a plate.
20. Repeat steps 5 - 19 till you have cooked all 4 portions.
21. Serve the 'Mitha Parathas' for breakfast/ brunch with hot tea/ coffee.
Serves 4 paneer paratha
What you need
For the Dough:
2 mugs good quality 'atta' [whole wheat flour] or plain white flour [maida]
1 mug water
For the filling:
2 cups grated plain 'paneer' [cottage cheese]
2 tablespoons, very finely chopped red onion
1 tablespoon, finely chopped green chilly
1 tablespoon, finely chopped fresh green coriander leaves
1 teaspoon 'zeera' seeds
1 teaspoon salt
1/2 teaspoon black pepper powder
1 whole, beaten egg [optional]
For Cooking
1/2 mug dry flour for dusting
1/2 mug cooking oil
A non-stick griddle ['tava']
Paneer Paratha
How to
Steps:
1. In a basin put the 'atta' and add the water a little at a time in the middle.
2. With clean hands, mix and knead the flour into a pliable dough.
3. Cover it with a cloth and leave for 15 minutes.
4. Divide the dough into 8 portions.
5. Take each portion and roll it into a ball in your palms.
6. Keep it on a flat surface, dust lightly with the dry flour and flatten it using a rolling pin to a circle of 10 cm in diameter.
7. Make all the 8 'circles' and keep them aside, separately on a flat surface so that they do not stick to each other.
8. To make the filling. put all the ingredients listed in a basin and mix lightly with a fork. Divide it into 4 parts. Keep it aside.
9. Place the griddle on medium heat and put a tablespoon of oil on it.
10. Take one 'circle' from step 7 and place it on the oil.
11. With a spoon take one part of the 'filling' from step 8 and spread it evenly over the 'circle' on the griddle.
12. Immediately, put a second circle on top of the 'filling' to fit exactly on the lower circle.
13. Press the edges of the circles with a fork to keep the filling in tact.
14. With the prongs of the fork, press on the surface a few times so that any air trapped in gets released.
15. Allow to cook for 1 minute and check that the lower side of the chapati had become light brown in colour.
16. Sprinkle another tablespoon of oil on the top surface and use a flat spoon/spatula to turn over the 'chapati'.
17. Let it cook for another minute so that both the sides become crisp and golden brown in colour.
18. Remove and place in a 'hot-pot' lined with some grease-proof paper.
19. Repeat steps 9 - 18 and make all the 4 'chapatis'
20. Serve the 'Paneer Parathas', hot with 'raitas' and your favourite 'chutneys' to make any meal very special.
Serves 4 ghobi paratha
What you need
For the Dough:
2 mugs good quality 'atta' [whole wheat flour] or plain white flour [maida]
1 mug water
For the 'Ghobi' Filling:
1 mug of washed, grated, fresh cauliflower
1 medium sized red onion, very finely chopped
1 teaspoon ginger paste
1 teaspoon 'zeera' seeds
1/2 teaspoon 'ajwain' seeds
1 teaspoon salt
1/2 teaspoon red chilly powder
1 teaspoon finely chopped fresh green chilly
1 tablespoon fresh green coriander leaves, chopped
1/4 teaspoon black pepper powder
1 tablespoon fresh lemon juice
For the Cooking:
1/2 mug dry flour to dust
1/2 mug cookingoil
A non-stick griddle ['tava']
Ghobi Paratha
How to
Steps:
1. To make the dough, put the flour in a basin and add the water, a little at a time in the middle.
2. With clean hands, mix and knead into a pliable dough.
3. Cover and leave it for 15 minutes.
4. Divide the dough into 8 parts.
5. Take each part in your palms and roll it into a ball.
6. Put it on a flat surface, dust it lightly with some dry flour and flatten it using a rolling pin, to a thin circle of 10-12 cm in diameter.
7. Make all the 8 'circles' and keep them aside, separately, on a flat surface so that they do not stick to each other.
8. For the 'filling', put all the ingredients listed in a basin and mix lightly with a fork. Divide it into 4 portions and keep aside.
9. Place the griddle on medium heat and put a tablespoon of oil on it.
10. Put 1 circle from step 7 on the oil and spread 1 portion of the filling from step 8 evenly all over the surface.
11. Quickly put a second 'circle' over the filling so that it fits exactly on the lower 'circle'.
12. Use a fork to press the edges slightly so that the two circles stick together and the filling stays inside.
13. Press the prongs of the fork a few time on the surface so that any air trapped in gets released.
14. Allow to cook for 1 minute so that the lower surface gets a golden brown coloration.
15. Sprinkle 1 tablespoon of oil on the top surface and using a flat spoon/spatula, carefully turn over the 'chapati' on the griddle.
16. Let this side cook for another minute so that both the sides are crisp and light brown in colour.
17. Remove from the heat and place in a 'hot-pot' lined with some grease proof paper.
18. Repeat steps 9 - 18 till you have made all the 4 'chapatis'.
19. Serve the unusually fantastic 'Ghobi Parathas', hot with 'pickles' and yogurt for lunch or dinner.
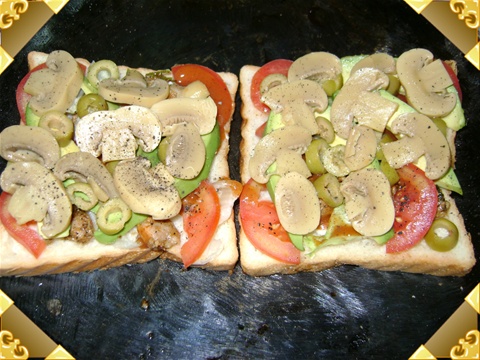
Serves 4 olive paratha
What you need
For the Dough:
2 mugs good quality 'atta' [whole wheat flour] or plain white flour ['maida']
1 mug water
For the Filling:
1/2 mug grated 'cheddar' cheese
1/2 mug pitted, drained, thinly sliced green/black olives
1/2 mug thinly chopped, drained mushrooms
2 tablespoons finely chopped red onion
1 teaspoon finely chopped fresh green chilly
1 teaspoon dry mixed herbs
1/2 teaspoon salt
1/2 teaspoon black pepper powder
For the cooking:
1/2 mug oil
1/2 mug dry flour for dusting
A non-stick griddle ['tava']
Olive Paratha
How to
Steps:
1. To make the dough, put the 'atta' in a basin and add the water, a little at a time to the middle.
2. With clean hands, mix and knead into a pliable dough.
3. Cover and leave it for 15 minutes.
4. Divide it into 8 parts.
5. Roll each part in your palms to make a ball.
6. Place it on a flat surface, dust it lightly with the dry flour and roll it with a rolling pin into a thin square or a circle of 10 - 12 cm in breadth.
7. Make all the 8 squares/circles and keep them separately on a flat surface so that they do not get stuck together.
8. To make the 'filling', put all the listed ingredients in a basin and mix lightly with a fork.
9. Divide the filling into 4 parts and leave it aside.
10. Place the griddle on medium heat and put 1 tablespoon of oil on it.
11. Put 1 square/circle on the oil and spread 1 part of the filling from step 9, evenly all over the surface.
12. Immediately, place a second square/circle from step 7 on top of the 'filling' so that it fits exactly on the lower one.
13. With a fork, press the edges firmly so that the two parts stick together and the filling stays inside.
14. With the prongs of the fork, prick a few times on the surface to release any trapped air.
15. Allow to cook for 1 -2 minutes so that the lower surface becomes slightly browned.
16. Sprinkle another tablespoon of oil on the top and carefully turn the 'chapati' over on the griddle.
17. Let it cook for another minute so that both the sides are crisp and golden brown in colour.
18. Remove and place in a 'hot-pot' lined with some grease proof paper.
19. Serve the extra-ordinary 'Olive Parathas' with 'sweet and hot' sauce and 'raitas' of your choice.

Serves 6 pieces chicken paratha
What you need
For the Dough:
2 mugs good quality 'atta' [whole wheat flour] or plain, white flour [maida]
1 mug water
For the Filling:
1 mug fresh, boneless chicken, cut into tiny cubes
1 teaspoon oil
1 teaspoon salt
1 teaspoon ginger paste
1 teaspoon garlic paste
1 teaspoon 'zeera' seeds
1/2 teaspoon red chilly powder
1/4 teaspoon black pepper powder
1 tablespoon fresh coriander leaves,chopped
2 tablespoon fresh spring onions, finely chopped
1 teaspoon fresh green chilly,chopped
For Cooking:
1/2 mug oil
1/2 mug dry flour for dusting
A non-stick griddle [tava]
Chicken Paratha
How to
Steps:
1. For the dough, put the flour in a basin and add the water, a little at a time, to the middle.
2. With clean hands, mix and knead into a pliable dough.
3. Cover with a cloth and leave for 15 minutes.
4. Divide the dough into 6 parts and roll each one in your palms to make a smooth ball.
5. Place one ball on a flat surface, dust it lightly with the dry flour and flatten it with a rolling-pin, to a circle of 10-12 cm in diameter.
6. Make all the 6 circles and keep them aside on a flat surface separately so that they do not get stuck to each other.
7. For the filling, put 1 teaspoon of oil in a cooking pan on high heat.
8. Add the chicken, salt, ginger and garlic paste.
9. Stir and let it cook for 5-10 minutes so that the liquid in it evaporates completely.
10. Remove from the heat and add all the other remaining ingredients listed for the filling.
11. Mix with a fork, divide into 6 portions and leave aside.
12. Place the griddle on medium heat and put a tablespoon of cooking oil on it.
13. Put 1 circle from step 6 onto the oil and spread one portion of the filling from step 11 evenly over half of the surface.
14. Quickly fold the other half of the circle over the filling and immediately press the edges firmly with a fork. This will ensure that the filling remains inside.
15. Pierce the top surface gently with the prongs of the fork to release any trapped air.
16. Allow to cook for a minute so that the lower surface becomes light brown in colour.
17. Sprinkle a tablespoon of oil on the top and turn over the 'half moon' chapati on the griddle.
18. Let this side also cook for a minute so that both the sides become crisp and golden brown in colour.
19. Remove from the griddle and place in a hot-pot lined with some grease proof paper.
20. Repeat steps 12 - 19 to make all the other 5 'chapatis'.
21. Serve the 'Chicken Parathas' hot with 'raitas', salads and 'pickles'of your choice.
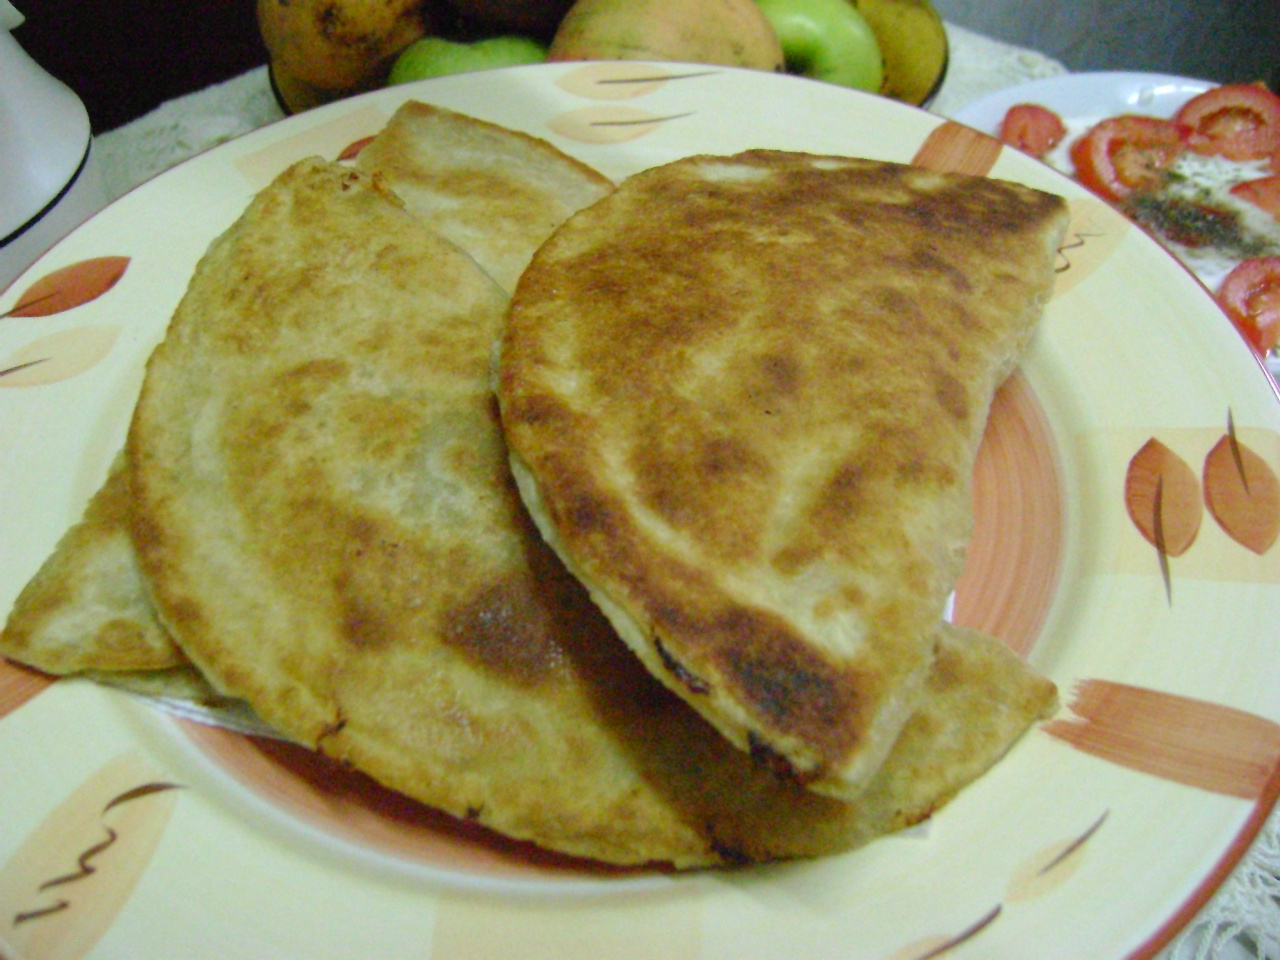
Serves 4 pieces kima paratha
What you need
For the 'Kima' Filling:
1 mug fresh, fine mince [beef/mutton]
1 teaspoon oil
1 teaspoon salt
1 teaspoon ginger paste
1 teaspoon garlic paste
1 big red onion,very finely chopped
1 tablespoon fresh coriander leaves,chopped
1 teaspoon fresh mint leaves, chopped
1 teaspoon fresh green chilly, chopped
1/2 teaspoon red chilly powder
1/4 teaspoon black pepper powder
1 teaspoon 'zeera' seeds
1/2 teaspoon 'ajwain' seeds
1 teaspoon dry coriander seeds
1 whole, beaten egg
For the Dough:
2 mugs good quality 'atta' or plain white flour [maida]
1 mug water
For Cooking:
1/2 mug oil
1/2 mug dry flour for dusting
A non-stick griddle ['tava']
Kima Paratha
How to
Steps:
1. For the dough, take a basin and put the flour in it. Add the water, a little at a time in the middle.
2. With clean hands, mix and knead the flour into a pliable dough.
3. Cover it with a cloth and leave it for 15 minutes.
4. Divide the dough into 8 parts and roll each one in your palms to make a smooth ball.
5. Take one ball, place it on a flat surface, dust it lightly with some dry flour.
6. Using a rolling pin, flatten it into a thin circle of 10 - 12 cm in diameter.
7. Make all the circles and keep them aside on a flat surface, separately so tat they do not stick to each other.
8. To make the filling, put a teaspoon of oil in a pan on high heat.
9. Add the mince, salt, ginger and garlic paste. Stir, cover and let it cook for 10 minutes till all its liquid dries up.
10. Remove from the heat. Add all the other ingredients listed for the 'filling'. Mix with a fork, divide it into 4 portions and leave aside.
11. Place the griddle on medium heat and put 1 tablespoon of oil on it.
12. Take 1 'circle' from step 7 and place it on the oil.
13. Spread 1 portion of the 'filling' from step 10, evenly all over the surface of the 'circle'.
14. Immediately take a second 'circle' and place it over the filling so that it fits exactly on top of the lower one.
15. With a fork press the edges to make the 'circles' join together.
16. Poke the prongs of the fork a few times over the surface to release any trapped air.
17. Allow to cook for a minute so that the lower side becomes golden brown.
18. Sprinkle a tablespoon of oil on the top and with a flat spoon or spatula, turn the 'chapati' over on the griddle.
19. Let this side also cook for a minute so that both the sides are crisp and light brown in colour.
20. Remove from the griddle and place in a 'hot-pot' lined with some grease proof paper.
21. Repeat steps 11 - 20 to make all the other 'chapatis' as well.
22. Serve the exotic "Kima Parathas" with 'dhahi-phaley' or any 'raitas' of your choice for brunch or lunch.
Serves 12 pieces kulchey
What you need
For the Dough:
1 kg white, self-raising flour [maida]
1 cup plain yoghurt
1/4 cup cooking oil or melted butter/margarine
1 whole egg,beaten
3 - 4 cups warm water
For Cooking:
A non-stick griddle [tava]
An oven grill
1 cup dry flour for dusting
1/4 cup butter/margarine
Mum's special Kulchey
How to
Steps:
1. In a basin, put the flour and make a depression in the middle.
2. Add the oil/butter/margarine and mix lightly.
3. Add the beaten egg and yoghurt. Mix.
4. Slowly, a little at a time, add just enough of the warm water to make a firm but pliable mixture.
5. Use your clean hands to knead the mixture to a soft dough.
6. Cover with a cloth and leave it aside for at least 1 hour so that it 'rises' properly.
7. Divide the dough into 12 portions.
8. Using your palms, roll them into smooth balls. Leave them aside separately so that they do not stick to each other.
9. Place the griddle on medium heat and pre-heat the grill on high intensity.
10. Put 1 'ball' from step 8 on a flat surface and dust it lightly with some dry flour.
11. Use a rolling pin to flatten the 'ball' into a circle which is 1 cm thick and about 12 cm in diameter.
12. Place it on the warm griddle and with the prongs of a fork,lightly pierce the surface at 5 - 6 places to release trapped air.
13. Let it cook for a minute so that the lower side of the circle is slightly browned.
14. Use a flat spoon or spatula to remove it from the griddle and immediately put it on the tray under the hot grill.
15. Allow to cook for another minute so that the top of the circle also gets a golden brown coloration.
16. Remove carefully and place in a hot-pot lined with a clean cotton cloth.
17. Smear the top of the cooked 'circle' with a teaspoon of butter/margarine.
18. Repeat steps 9 - 17 till you have made all of the 'circles'.
19. Serve these 'Mum's Special Kulchey ', warm, with any meat/vegetarian 'curry' for lunch or dinner
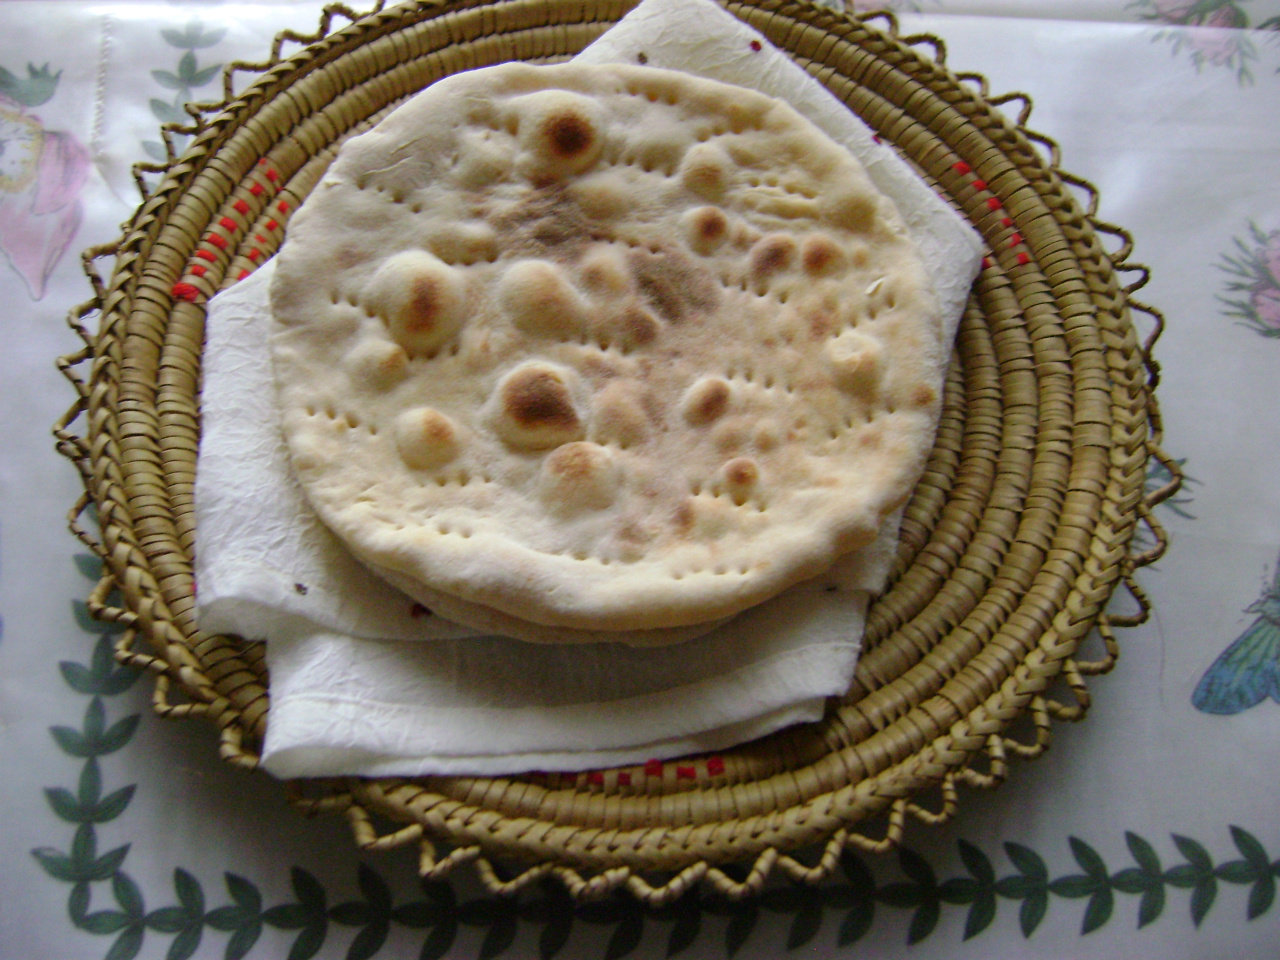
Serves 6 pieces simple naan
What you need
For the Dough:
3 mugs self-raising, white flour
1 and 1/2 mug warm water
For the Cooking:
1/2 mug dry flour for dusting
A non-stick griddle ['tava']
An oven grill
Simple Naan
How to
Steps:
1. In a basin, put the flour and add the water, a little at a time in the middle.
2. With clean hands, mix and knead into a pliable dough.
Leave it covered for at least 1 hour so that it 'rises'.
3. Divide the dough onto 6 portions and roll each one in your palms to make a smooth ball.
4. Keep all the 'balls' aside separately so that they do not stick to each other.
5. Place the griddle on medium heat and let the grill get pre-heated at high intensity.
6. Take 1 'ball' from step 4, place it on a flat surface and dust it lightly with some dry flour.
7. Use a rolling-pin to flatten it to a 'circle' about 1 cm in thickness and 10-12 cm in diameter.
8. Place it on the warm griddle and with a fork, make some prong marks on the surface to release trapped air.
9. Let it cook for 1 minute and check the lower surface. It should become slightly golden brown.
10. Lift it from the griddle carefully and place it on the oven rack/tray under the hot grill.
11. Allow to cook for another minute so that the top surface also become golden brown in colouration.
12. Remove from the grill and place in a hot-pot lined with a clean cotton cloth. Keep it covered so that it remains warm and soft.
13. Repeat steps 5 to 12 till you have made all the pieces.
14. Serve the 'Simple Naans' with any meat/vegetarian 'curry' for lunch or dinner.
Serves 10 pieces methi naan
What you need
For the Dough:
3 cups white, self-raising flour
1/2 cup yellow gram flour [besan]
1 cup fresh, plain yoghurt
1/4 cup cooking oil
1 teaspoon salt
1/2 teaspoon red chilly powder
1 teaspoon 'zeera' seeds
1 teaspoon dry coriander seeds
1/2 teaspoon black pepper powder
1 teaspoon fresh green chilly, finely chopped
1 teaspoon garlic paste
1 teaspoon ginger paste
1 large, red onion,very finely chopped
1/2 cup fresh green coriander leaves, chopped
2 cups fresh 'methi' [fenugreek] leaves, chopped
1/2 to 1 cup of warm water
For the Cooking:
1/2 cup dry flour for dusting
1/2 cup soft unsalted butter
A non-stick griddle
An oven grill
Methi Naan
How to
Steps:
1. For the dough, take a basin and put in it all the ingredients listed, one by one, mixing gently.
2. Knead into a pliable dough with clean hands, cover it with a cloth and let it rest for 1 hour.
3. Divide it into 10 portions and rolling each one in your palms, make them into smooth balls. Leave them aside.
4. Place the griddle on medium heat and preheat the grill at high intensity.
5. Place one dough ball on a flat surface and dust it lightly with the dry flour.
6. Using the rolling pin, flatten the ball into a circle of 10-12 cm in diameter.
7. Place it on the warm griddle and pierce the surface with the prongs of a fork,several times. This will release any trapped air.
8. Allow to cook for 1-2 minutes so that the lower surface becomes slightly browned.
9. Lift carefully from the griddle and place the 'circle' on the tray/rack under the hot grill.
10. Let it cook for another minute till the top surface becomes slightly browned.
11. Remove from the grill and place in a hot-pot lined with a cotton cloth.
12. Smear 1 teaspoon of the soft butter on the top surface of the cooked 'naan'
13. Repeat steps 4 - 12 till you have made all the ten pieces.
14. Serve the delicious 'Methi Naans' with 'raitas', butter-milk and salads of your choice.
Serves 6 pieces kima naan
What you need
For the Dough:
2 mugs self raising, white flour
3/4 mug warm water
2 tablespoons oil
2 tablespoons fresh,plain yoghurt
For the Filling:
250 gm fresh, fine, mutton mince
1 teaspoon oil
1 teaspoon ginger paste
1 teaspoon garlic paste
1 teaspoon 'zeera' seeds
1/2 teaspoon 'ajwain' seeds
1 teaspoon salt
1/2 teaspoon red chilly powder
1/2 teaspoon black pepper powder
1/2 teaspoon green chilly, finely chopped
1 tablespoon fresh, green coriander leaves, chopped
1 large,red oinon, very finely chopped
1 whole egg, well beaten
For Cooking:
1/2 mug dry flour for dusting
1/2 mug soft butter/margarine
A non-stick griddle
An oven grill
Kima Naan
How to
Steps:
1. To make the dough, put the flour in a basin and add the oil and the yoghurt. Mix lightly.
2. In the middle add a little at a time,the warm water and with your clean hands, knead into a pliable dough.
3. Cover with a cloth and let it rest for 30 minutes.
4. Divide the dough into 6 portions and roll each one in your palms to make smooth balls. Leave them aside.
5. For the filling, put the oil in a pan on high heat.
6. Add the ginger and garlic paste and stir.
7. Add the mince and the salt. Cover and let it cook for 10 - 15 minutes till any liquid in it evaporates.
8. Remove from the heat, wait for 10 minutes and then add all the other ingredients listed for the filling.
9. Mix thoroughly with a fork. Divide the filling into 6 parts and leave aside.
10. Place the griddle on medium heat and preheat the grill on high intensity.
11. Take one dough ball from step 4, place it on a flat surface and dust it with a little dry flour.
12. With a rolling pin, flatten it to a thick disc about 8 cm in diameter.
13. With a spoon take 1 portion of the filling from step 9 and place it in the middle of the 'disc'.
14. Lift the edges of the 'disc' upwards to the middle so that the filling gets completely covered with the dough.
15. Press gently with your fingers to make the filling stay inside the 'disc' ball.
16. Dust lightly with the dry flour and with the rolling pin flatten the 'disc' ball again to make a 'circle' 10-12 cm in diameter.
17. Slide it carefully onto the warm griddle and press the prongs of a fork on its surface to release any trapped air.
18. Allow to cook for 1 or 2 minutes till the lower surface has become slightly golden in colour.
19. With a flat spoon or spatula, lift the 'circle' from the griddle and place it immediately on the tray/rack under the hot grill.
20. Let it cook for another 2 minutes so that the top surface gets a golden brown colouration.
21. Carefully remove it from the grill and place it in a hot-pot, lined with a clean cotton cloth.
22. Smear 1 teaspoon of butter/margarine on the top surface.
23. Repeat steps 10 - 22 till you have made all the 6 pieces.
24. Serve the exotic "Kima Naans", hot with 'raitas', 'dhahey bhaley' and mixed salads for lunch or dinner.
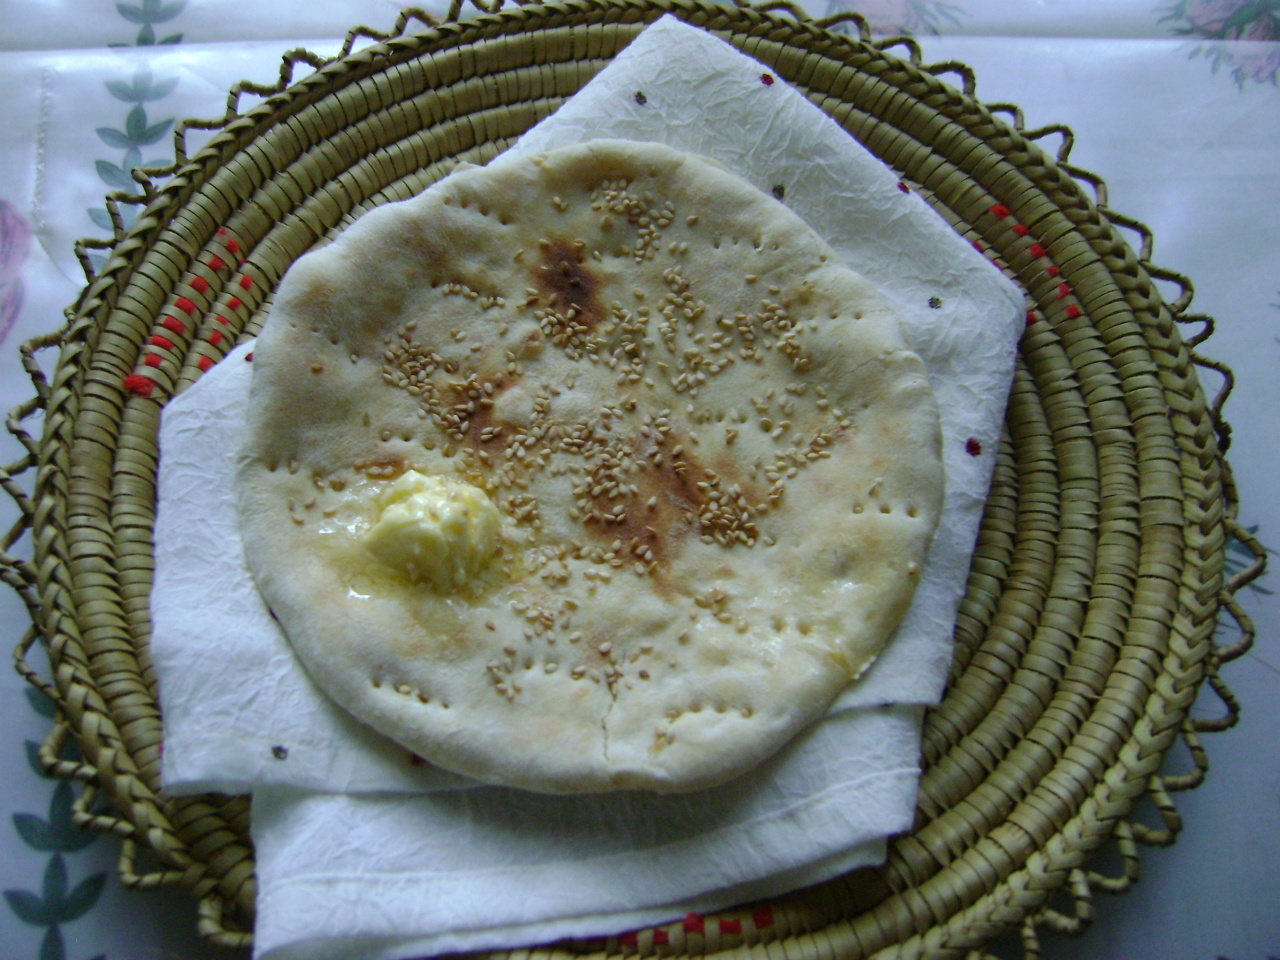
Serves 6 pieces rogani naan
What you need
For the Dough:
2 mugs self-raising, white flour
1/2 cup fresh, plain yoghurt, beaten
1/2 cup oil
1/2 cup fresh milk
1 cup warm water
For the Topping:
1/2 cup cleaned 'till' [sesame] seeds
1/2 cup salted butter
For Cooking:
1/2 mug dry flour for dusting
A non-stick griddle
An oven grill
Rogani Naan
How to
Steps:
1. In a basin put the flour and the oil. Mix lightly.
2. Make a 'well' in the middle and add the yoghurt and milk. Mix again.
3. Now add the water, a little at a time and with your clean hands, knead till you have a pliable dough.
4. Cover it with a cloth and let it rest for at least 30 minutes.
5. Divide the dough into 6 portions and roll each one in your palms to make smooth 'balls'. Leave aside.
6. Place the griddle on medium heat and pre-heat the oven grill at high intensity.
7. Take 1 dough 'ball' from step 5, place it on a flat surface and dust it lightly with a little dry flour.
8. Using a rolling-pin, flatten it into a circle about 10 - 12 cm in diameter.
9. Place it on the warm griddle. Sprinkle a few drops of water on the surface and spread 1 teaspoon of the 'till' seeds all over it.
10. With the fork make some prong marks on the 'circle' so that any trapped air may be released.
11. Allow to cook for 1 or 2 minutes till the lower surface is slightly golden in colour.
12. Lift carefully and place the 'circle' on the tray/rack under the hot grill.
13. Let it cook for another minute till the top surface starts getting golden brown spots on it.
14. Remove and put in a hot pot lined with a clean cotton cloth.
15. Smear 1 teaspoon of butter on the surface of the cooked 'naan'.
16. Repeat steps 6 - 15 till you have made all the 'naans'
17. Serve the special, fancy, "Rogani Naans" with any meat or vegetarian 'curry' for lunch or dinner
Serves 10 pieces brown naan
What you need
For the Dough:
8 cups of good quality 'atta' [whole wheat flour]
4 teaspoons baking powder
1/2 teaspoon bicarbonate of soda powder
1 teaspoon salt
1/2 cup cooking oil
1/2 cup fresh, beaten plain yoghurt
1 whole egg, beaten
2 cups warm water
For Cooking:
1/2 cup dry flour for dusting
1/2 cup salted butter
A non-stick griddle ['tava']
An Oven Grill
Brown Naan
How to
Steps:
1. In a basin, put the flour, bicarbonate soda, baking powder and the salt. Mix lightly.
2. In the middle, make a 'well' and put in the egg, oil and yoghurt. Mix again.
3. Add the warm water, a little at a time and with your clean hands knead into a pliable dough.
4. Cover it with a cloth and leave it to rest for at least 2 hours.
5. Divide the dough into 10 portions and roll each one in your palms to make a smooth 'ball'. Leave aside.
6. Place the griddle on medium heat and set the grill on high intensity.
7. Put one dough 'ball' on a flat surface and dust it lightly with some dry flour.
8. With the rolling pin, flatten it to a circle of about 10 - 12 cm in diameter.
9. Place it on the warm griddle and with the prongs of a fork, make a few marks on the surface to allow any trapped air to be released.
10. Let it cook for 2 minutes so that the lower surface becomes slightly golden in colour.
11. Remove carefully and place it on the tray or rack under the hot grill.
12. Allow to cook for another 2 minutes tillyou can see brown spots forming on the surface.
13. Remove and place in a hot pot lined with a clean cotton cloth.
14. Smear 1 teaspoon of butter on the surface of the 'naan'.
15. Repeat steps 6 - 14 till you have made all the 'naans'.
16. Serve the nutritious "Brown Naans", hot with any meat/vegetarian curry of your choice for lunch or dinner.

Serves 4 toudey
What you need
For the Dough:
2 mugs of very finely ground maize flour [ yellow or white with a pinch of yellow food colour]
1 mug warm water
For Cooking:
A non-stick griddle
1/4 mug salted butter
1/4 mug dry maize flour
Toudey
How to
Steps:
1. In a basin put the corn flour and add the water, a little at a time.
2. With clean hands, mix and knead it slowly for 15 minutes till you have a pliable, well binding dough.
3. Cover it and leave aside for 30 minutes.
4. Divide into 4 portions and roll each one in your palms to make smooth 'balls'. Leave aside.
5. Place the griddle on medium heat.
6. Take 1 dough 'ball' from step 4 and place it on a flat surface. Sprinkle a little dry flour on it.
7. With a rolling pin, flatten it into a circle 10 - 12 cm in diameter.
8. Carefully slide it onto the warm griddle and let it cook for a couple of minutes so that the lower surface starts getting golden brown spots on it.
9. With a flat spoon/spatula turn over the 'circle' and let it cook for a further 2 minutes.
10. When both the sides are golden brown, remove and place in a hot-pot lined with a clean cotton cloth.
11. Smear the top of the cooked 'circle' with a teaspoon of butter.
12. Repeat steps 5 - 11 till you have made all the 'circles'.
13. Serve these traditional, eastern "Toudey", hot with 'saagh', butter-milk and yoghurt.
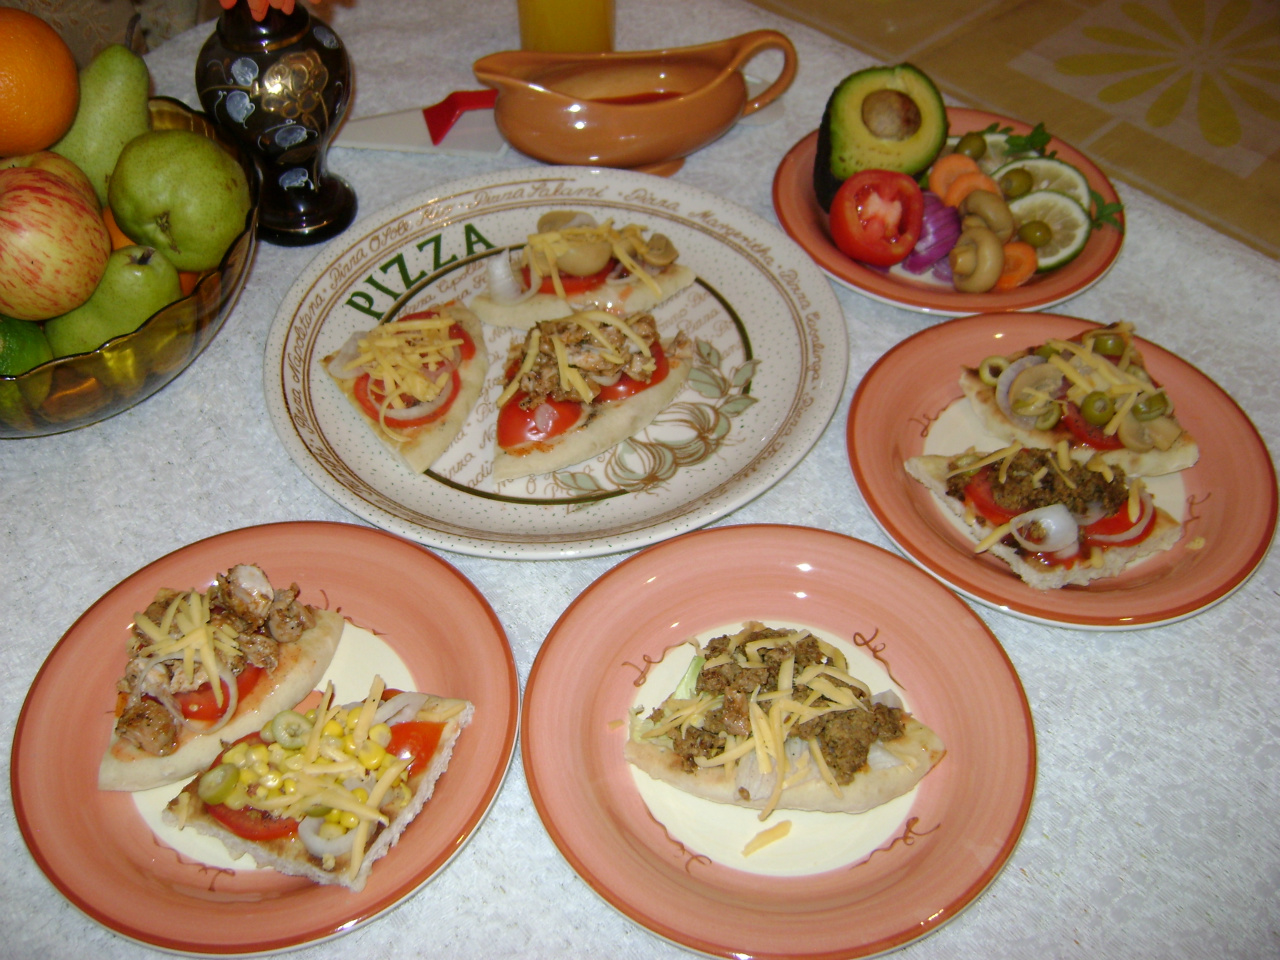
Serves 3 pieces pizza
What you need
For the Dough:
2 mugs plain, white/brown flour
2 teaspoons dried, active yeast
1 teaspoon sugar dissolved in 3 tablespoons water
1/4 teaspoon salt
1 tablespoon oil
1 cup warm water
For the Bases:
1/2 cup dry flour
1/4 cup oil for greasing baking tray
A pre-heated Oven
A Grill
For the Toppings:
Here are 6 favourites - the ingredients are listed in the order in which you may assemble them on one of the 'bases'.
1. SIMPLE PIZZA:
1 tablespoon tomato sauce
1 teaspoon red chilly sauce
1 large tomato, thinly sliced
1 pinch salt
1 pinch black pepper powder
1 pinch mixed, dry herbs
1/2 cup grated mozarella/cheddar cheese
2. CORN PIZZA:
1 tablespoon tomato sauce
1 teaspoon red chilly sauce
1 small green capsicum, thinly sliced
1 small tomato, thinly sliced
1/4 cup drained sweet corn off the cob
1 pinch salt
1 pinch black pepper powder
1 pinch mixed dry herbs
1/2 cup grated cheese of your choice
3. PINE-APPLE PIZZA:
1 tablespoon tomato sauce
1 teaspoon red chilly sauce
1 small tomato, thinly sliced
1/4 cup diced pineapple
1/4 cup sliced mushroom
1/4 cup sliced green/black olives
1 pinch salt
1 pinch black pepper powder
1 pinch dry, mixed herbs
1/2 cup grated cheese of your choice
4. CHICKEN PIZZA:
1 tablespoon tomato sauce
1 teaspoon red chilly sauce
1 small tomato, thinly sliced
1 small white onion, thinly sliced
1/2 cup diced, broiled, boneless chicken
1 pinch salt
1 pinch black pepper powder
1 pinch dry, mixed herbs
1/2 cup grated cheese of your choice
5. MINCE PIZZA:
1 tablespoon tomato sauce
1 teaspoon red chilly sauce
1 small white onion, thinly sliced
1 small tomato, thinly sliced
1 small green capsicum, thinly sliced
1/2 cup broiled mince [mutton/beef]
1 pinch salt
1 pinch black pepper powder
1 pinch dry, mixed herbs
1/2 cup grated cheese of your choice
6. STEAK PIZZA:
1 tablespoon tomato sauce
1 teaspoon red chilly sauce
1 small white onion, thinly sliced
1 small green/red capsicum, thinly sliced
1/2 cup thin strips of broiled beef steak
1 pinch salt
1 pinch black pepper powder
1 pinch dry, mixed herbs
1/2 cup grated cheese of your choice
Pizzas
How to
Steps:
1. In a small bowl, put the dissolved sugar solution and the yeast. Mix and keep it aside for 10 minutes till it becomes frothy.
2. Put the flour in a basin and add the salt. Mix and add the yeast solution.
3. In the middle add the oil and the warm water, a little at a time.
4. With clean hands, knead for 10 minutes into a stiff dough.
5. Cover it and leave it aside for 1 hour at room temperature.
6. Knead the risen dough lightly again for a few minutes to make a smooth and elastic dough.
7. Divide the dough into 3 portions and roll each one in your palms to make a smooth ball. Leave aside.
8. Pre heat the oven at 180 degrees C and grease the baking tray with a little oil. Let the Grill also get heated to high intensity.
9. Take one ball, place it on a flat surface and sprinkle a little dry flour over it.
10. With a rolling pin, flatten it into a thick circle 10 - 12 cm in diameter.
11. Place it on the greased baking tray and put it in the preheated oven.
12. Let it cook for 5 - 8 minutes and remove the baking tray with the 'base' in it.
13. Choose the 'Topping' and assemble the ingredients listed for it onto the 'base'.
14. Now put the baking tray under the hot grill and let it cook for 5 minutes till the cheese starts to melt.
15. Remove and place it on a serving dish.
16. Repeat steps 8 - 15 till you have made all 3 pieces.
17. Serve the home-made favourite "Pizzas", hot with cold drinks and fruit juices.
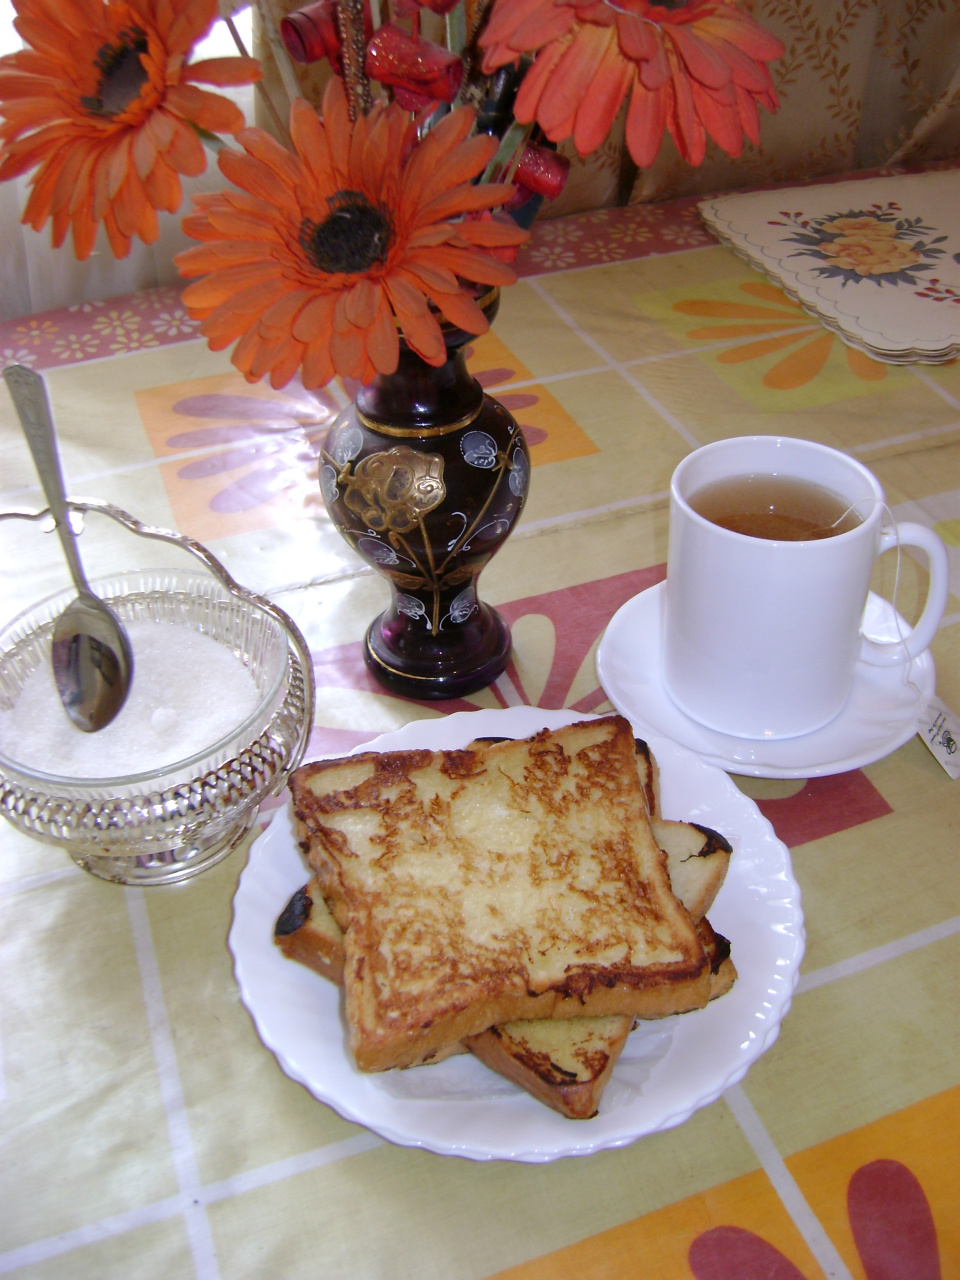
Serves 4 pieces french toast
What you need
For Spicy French Toast:
4 slices of fresh white/brown bread
The Batter:
2 fresh eggs
1/2 teaspoon salt
1/4 teaspoon black pepper powder
1/4 teaspoon red chilly powder
1/4 teaspoon 'zeera' seeds
1/2 teaspoon fresh green coriander leaves, chopped
4 tablespoons oil/butter/margarine for frying
For Sweet French Toast: 😋
4 slices of fresh white/brown bread
The Batter:
2 fresh eggs
2 tablespoons milk/orange juice
3 tablespoons sugar
4 tablespoons butter/margarine for frying
French Toasts
How to
Steps:
1. Choose the type of French Toast and put the ingredients of the Batter in a large soup plate.
2. Whisk briskly to mix the contents properly to make a smooth batter. Leave it aside.
3. Put a non-stick frying pan on medium heat and add a tablespoon of oil/butter/margarine.
4. Take one slice of the bread and dip it in the Batter so that both the sides are covered completely.
5. Place it on the frying pan and let it cook for a minute.
6. Using a spatula/flat spoon, turn the slice over and let the other side also cook for a minute so that both the sides attain a golden brown colour.
7. Remove onto a plate lined with some grease-proof paper.
8. Repeat steps 3 - 7 till you have fried all the slices.
9. Serve the "French Toasts", warm with tea, coffee, milk-shake or any juice for breakfast or brunch.
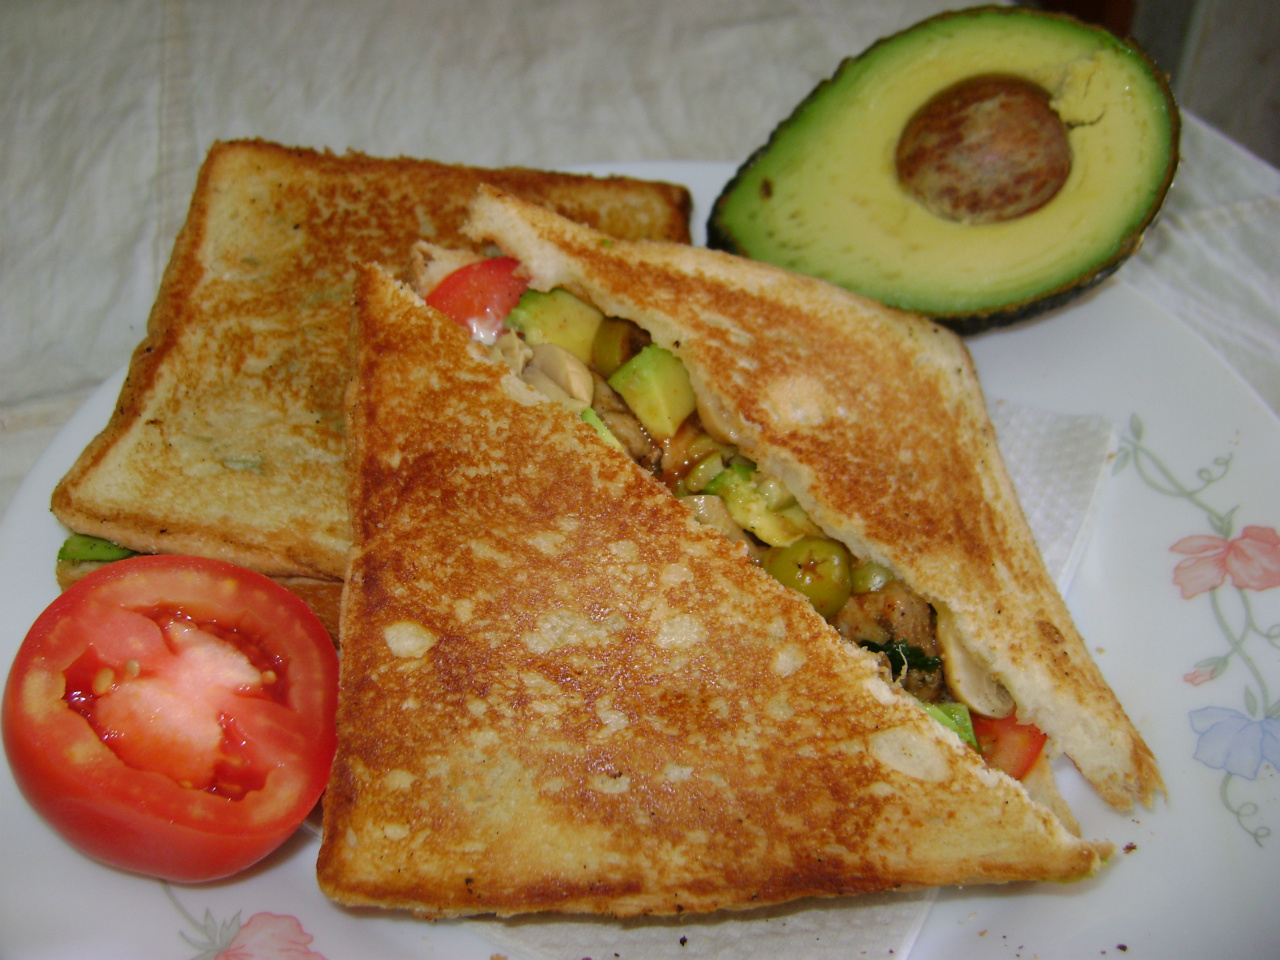
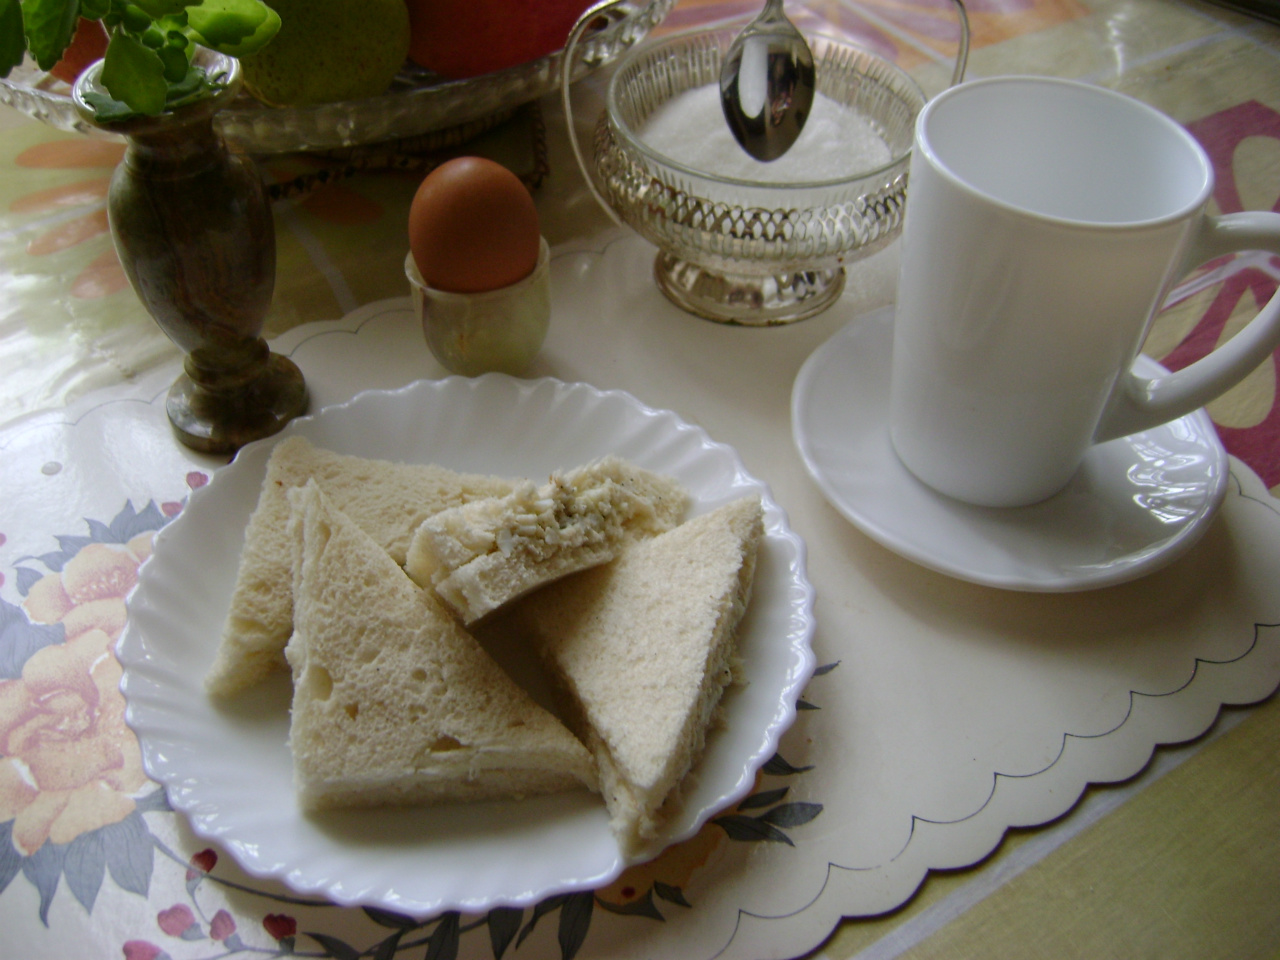
Serves 2 pieces avocado sandwich
What you need
An electric toasted sandwich maker
4 large slices of fresh white/brown bread
4 teaspoons of butter
4 teaspoons mayonaise
4 fresh lettuce leaves
1 large red tomato, cut thinly into 8 slices
1 ripe avocado, peeled, pitted and cut into 8 slices
1/2 teaspoon salt
1/2 teaspoon black pepper powder
2 teaspoons chilly sauce
4 slices of broiled chicken (optional)
Healthy Avocado Sandwich
How to
Steps:
1. Preheat the Sandwich maker.
2. Butter the bread and place 1 slice on the warm plate with the buttered side facing downwards.
3. Spread 1 teaspoon of mayonnaise on top of the slice.
4. Put a lettuce leaf on it, then two slices of tomato, pinch of salt, pepper and a little chilly sauce.
5. Place 2 slices of the chicken and 4 slices of the avocado on it.
6. Then place another lettuce leaf on top.
7. Finally place the buttered slice over it so that the buttered side faces upwards.
8. Close the lid of the sandwich maker and allow to cook for 3 - 4 minutes so that the slice attain a crisp, golden brown colour.
9. Remove carefully an place on a plate lined with grease-proof paper.
10. Repeat steps 1 - 9 to make the second sandwich.
11. Serve these "Healthy Avocado Sandwiches" warm with juice or milk-shake.
Serves 2 pieces vege sandwich
What you need
An electric Toasted Sandwich Maker
4 large slices of fresh, white/brown bread
4 teaspoons of butter
4 teaspoons mayonnaise
2 lettuce leaves
1 small white onion, thinly sliced to 6 circles
1 tomato, thinly cut into 6 slices
2 tablespoons of sliced olives
2 tablespoons grated cheese
4 tablespoons of mushrooms, thinly sliced
1/2 teaspoon salt
1/2 teaspoon black pepper powder
1 teaspoon chilly sauce
Mushroom Vege Sandwich
How to
Steps:
1. Preheat the Sandwich Maker.
2. Spread 1 teaspoon of butter on each the slices of bread and keep aside.
3. Place 1 slice on the preheated plate with the buttered side facing down.
4. Smear a teaspoon of mayonnaise on the slice and place a lettuce leaf on it.
5. Put threes slices each of onion and tomato. Sprinkle a pinch of salt, black pepper and some chilly sauce.
6. Spread 2 tablespoons of the mushroom slices and 1 tablespoon each of the olives and grated cheese on it.
7. Cover with another bread slice from step 2. This time the buttered side should face upwards.
9. Close the Sandwich Maker and allow to cook for 4-5 minutes so that both the sides of the sandwich are crisp brown in colour.
10. Remove carefully and place on some grease-proof paper on a plate.
11. Repeat all the steps to make the second sandwich.
12. Serve the "Mushroom Vege Sandwiches", warm, with fruit juices or milk shakes.
Serves 2 pieces favourite sandwich
What you need
4 large slices of white/brown bread or buns
4 teaspoons butter for spreading on slices
Favourite Fillings:
1. For 'naivasha' sandwich:
2 hard boiled eggs, mashed with a teaspoon of
butter, a pinch each of salt and black pepper
powder.
2. For 'minty' sandwich:
4 tablespoons of fresh mint leaves, 1 green chilly,
1 tablespoon of green coriander leaves,
1/4 teaspoon salt, all ground to a thick paste.
4 tablespoons mashed potato
3. For 'Cooly-cool' sandwich:
2 fresh lettuce leaves, 6 thin slices tomato,
8 thin slices of cucumber, 1/4 teaspoon salt
1/4 teaspoon black pepper powder
4. For 'Chicky' sandwich:
2 fresh lettuce leaves, 2 teaspoons mayonnaise
4 thin slices tomato, 4 thin slices white onion,
2 large, flat pieces of broiled chicken breast,
1/4 teaspoon salt, 1/4 teaspoon black pepper
powder.
5. For 'Turkish' sandwich:
2 fresh lettuce leaves, 2 large slices of broiled
turkey, 4 slices of thinly cut white onion,
1/4 teaspoon salt, 1/4 teaspoon black pepper
powder, 1 teaspoon red chilly sauce.
6. For 'Steaky' Sandwich:
2 fresh lettuce leaves, 4 tablespoons sauteed fillet
steak strips, 4 thin slices white onion, 1/4 teaspoon
salt, 1/4 teaspoon black pepper powder.
Favourite Sandwich Ideas
How to
Steps:
1. Butter the slices of bread and keep them aside.
2. Choose your favourite sandwich filling and keep the ingredients ready.
3. Take two plates and put 1 slice of the buttered bread on each of them.
4. Assemble half of all the ingredients listed on one slice and the other half on the second slice of bread.
5. Cover each of the fillings with the other two buttered slices of bread from step 1.
6. Press slightly and using a bread knife, cut into triangles.
7. Serve the "Favourite Sandwiches" with milk-shakes or fruit juices for a fulfilling, healthy meal or snack.
Comments
mona
17.06.2015 16:28
yummyyyyy!! just luv 'm' all! fantastic recipe's ... :))
Latest comments
19.11 | 07:25
You are so kind. Do see other pages on menu. You will enjoy. Bless you. Luvv.
19.11 | 01:25
Sad to know that Ms M Butt is no more. May her soul rest in eternal peace... Ameen ❤️
19.11 | 01:22
You were my favorite biology teacher. I never forgot you😊
22.06 | 09:34
Thanks dear arfa. Check out other pages on the menu. You will enjoy. God bless.
Share this page